How to Sew the Slip Stitch: A Beginner's Guide to Invisible Hemming

Slip Stitch: The Secret to Invisible Seams
The slip stitch is a handy little stitch that’s perfect for creating invisible hems and securing seams. It’s a bit tricky at first, but once you get the hang of it, you’ll love the professional-looking results.
Step-by-Step Guide
Step 1. Start by threading your needle with a suitable thread and knot the end, making sure to leave a short tail of thread after the knot – this prevents the knot from coming undone.
The type of thread you use will depend on the project you are working on. For example, if you are sewing a delicate fabric, you will want to use a fine thread. If you are sewing a heavier fabric, you will want to use a thicker thread.
Step 2. Prepare your fabric for sewing. You can use sewing pins to temporarily keep two pieces of fabric together while stitching them. You can also mark your fabric with a pencil or tailors sewing chalk, or draw a guideline with them for sewing the thread.
Step 3. Fold your fabric edge or seam allowance twice to create a narrow hem. Make sure that the fold is even and secure.
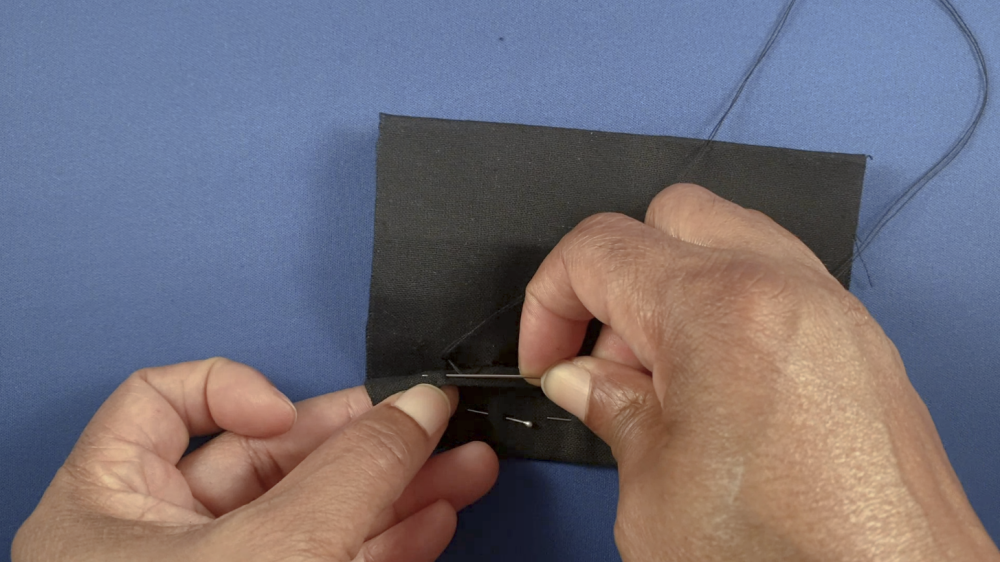
Step 4. Start the stitch in between the two layers of fabric (if stitching two pieces of fabric together) – this will neatly hide the knot in between the pieces of fabric after sewing. Bring the needle up through the folded fabric, slightly away from the fold, where you want to start your Slip Stitch.
Next, you want to anchor or secure the thread on to the fabric before you continue stitching – this will prevent the thread from unravelling. To do this, take the needle back down through the folded fabric – close to where you came up, and pull it through the other side. Then, take the needle back through the fabric again – close to where you came out. Once done, the thread will be anchored to the fabric.
Step 5. Take a small stitch on the folded fabric, inserting the needle through both layers.
Step 6. Push the needle from the inside of the folded edge to the outside, catching a tiny bit of the folded fabric.
Step 7. Before pulling the thread tight, push the needle through the fabric you’re attaching, catching a tiny bit of that fabric.
Step 8. Next, pull the thread tight and then push the needle back into the folded edge, close to the previous stitch.
Repeat step 6 to 8, keeping the stitches small and close together for an invisible finish.
Continue stitching along the folded edge or seam allowance until you reach the end.
Step 9. To secure the stitch, create a small backstitch or make a knot at the end of your stitching line. To do this, take a small stitch at the top layer of the fabric, close to your last stitch, (not going through to the other side), and slowly pull the needle through until you see a small loop at the end of the thread. – do not pull the thread all the way through.
Gently take the needle through the small loop, and pull some of the thread through. Take the needle through the loop again, and pull the thread all the way through until the knot is secure.
Finally, run the needle behind a couple of the stitches, in between the two layers of fabric, and pull it out at the end of the second stitch. Once done, you can cut the thread as close to the fabric as possible – this will leave a neatly hidden small tail at the end of the knot to prevent it from becoming undone.
Tips for Success
Practice makes perfect: The slip stitch takes a bit of practice, but it’s definitely worth the effort.
Keep your stitches small: The smaller your stitches, the more invisible your seam will be.
Use a sharp needle: A sharp needle will make it easier to create neat and even stitches.
Be patient: It may take some time to get the hang of the slip stitch, but don’t give up!
The slip stitch is a valuable technique for any sewer. With a little practice, you’ll be able to create beautiful and invisible finishes on your projects.