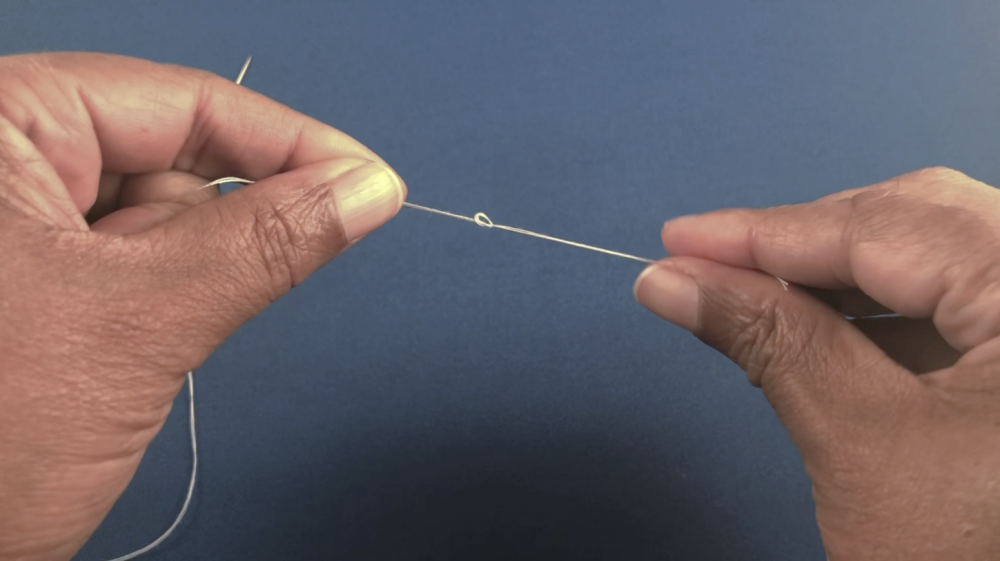
Sewing for Beginners: A Comprehensive Guide
From Sewing Newbie to Nifty Needle Master: Your Beginner’s Guide!
Remember that moment of wonder when you saw someone whip up something amazing from just fabric and thread? You probably dreamt of wielding a needle yourself, creating comfy blankets or stylish clothes. But then maybe some self-doubt snuck in, whispering, “It’s too tricky, too hard, not for you.” Well, dear sewing beginner, silence those whispers! Today, we’re starting a journey that will transform you from a sewing observer into a confident stitcher, ready to express yourself with every stitch.
Now, I know what you’re thinking. Sewing needles might seem a bit scary, like a fancy sword to someone who’s never used one. But don’t you worry! This guide is your best friend, offering all the knowledge you need to conquer your fears and stitch your way to success. And guess what? You’re definitely not alone on this adventure. Whether you’re a complete beginner or just looking to brush up on the basics, I’m here to guide you every step of the way.
Plus, to sweeten the deal, I have a secret weapon: a free e-book called “How to Sew: A Beginner’s Guide to Sewing.” Think of it as your sewing bible, packed with clear instructions, helpful tips, and fun projects to keep you stitching long after you finish this blog post. So, download it now and keep it handy – it’ll be your trusty sidekick on this sewing journey!
Before we dive into the details, let’s address the elephant in the sewing room: fear. It’s totally normal to feel a bit nervous, but trust me, the rewards far outweigh the initial jitters. Sewing isn’t just about making beautiful things; it’s about expressing yourself, being mindful, and feeling the satisfaction of learning a new skill. So, take a deep breath, banish those doubts, and get ready to unleash your inner sewing superhero!
Setting Up a Sewing Space
Creating a dedicated sewing space, no matter how small, can make all the difference in your sewing experience. Find a corner of your home where you can set up your sewing machine, organize your supplies, and let your creativity flow. Whether it’s a spare room, a cozy nook, or even just a corner of the dining table, having a designated sewing space will make it easier to dive into your projects whenever inspiration strikes.

In the next section, we’ll explore the essential sewing supplies and tools you’ll need to kickstart your sewing journey. So, roll up your sleeves and get ready to stock your sewing kit – the fun is just beginning!
Essential Sewing Supplies and Tools
Now, let’s gather our tools. Don’t worry, you won’t need a whole shed full! Think of it as your sewing starter pack:
- Fabric: Choose beginner-friendly options like cotton or linen. Imagine soft, flowing curtains or a snuggly tote bag waiting to be born!
- Needle and thread: Your trusty duo. Pick a needle size suitable for your fabric (the e-book will guide you!). Thread colour? Let your imagination run wild!
- Scissors: Sharp and precise, like your sewing skills soon will be!
- Ruler and marking pen: For planning and accuracy (think of them as your sewing map and compass).
- Pins: Tiny helpers to hold your fabric in place.
- Optional (but super handy): Sewing machine, iron, needle threader, and seam ripper (because even superheroes make mistakes sometimes!).
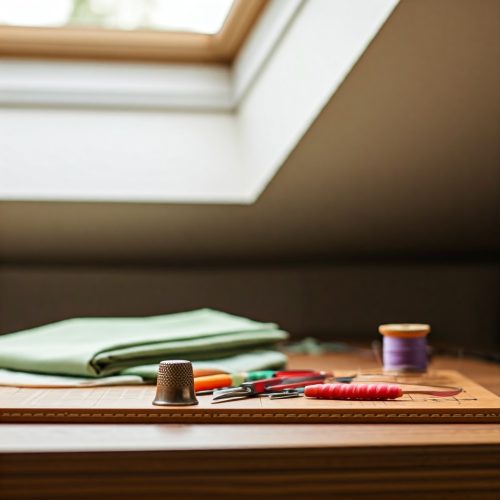
When shopping for sewing supplies and tools, quality matters. Invest in the best-quality supplies and tools you can afford, as they will make your sewing experience more enjoyable and your finished projects more professional-looking. Look for reputable brands and read reviews to ensure you’re getting the best value for your money.
Remember, these are just the basics. You can always add more tools to your arsenal as your skills grow. But for now, let’s focus on mastering the foundation.
Sew Much to Stitch, Sew Little Time! Mastering the Basics
Now that you’ve gathered your tools and banished those self-doubts, it’s time to step into the exciting world of sewing stitches! Think of them as the building blocks of your creations, the tiny heroes holding your fabric dreams together. Don’t worry, we’ll start with the simplest ones, gradually building your stitching confidence like a brick wall, stitch by stitch.
For hand sewing, the two essential stitches you’ll need to master are:
- Running stitch: Imagine a little runner gracefully hopping across your fabric, leaving a trail of thread behind. This stitch is perfect for temporarily holding pieces together during sewing or gathering fabric. It’s easy-peasy: push your needle through the fabric from the back, bring it up a short distance ahead, push it back down through the fabric close to the first hole, and repeat. Simple, right?
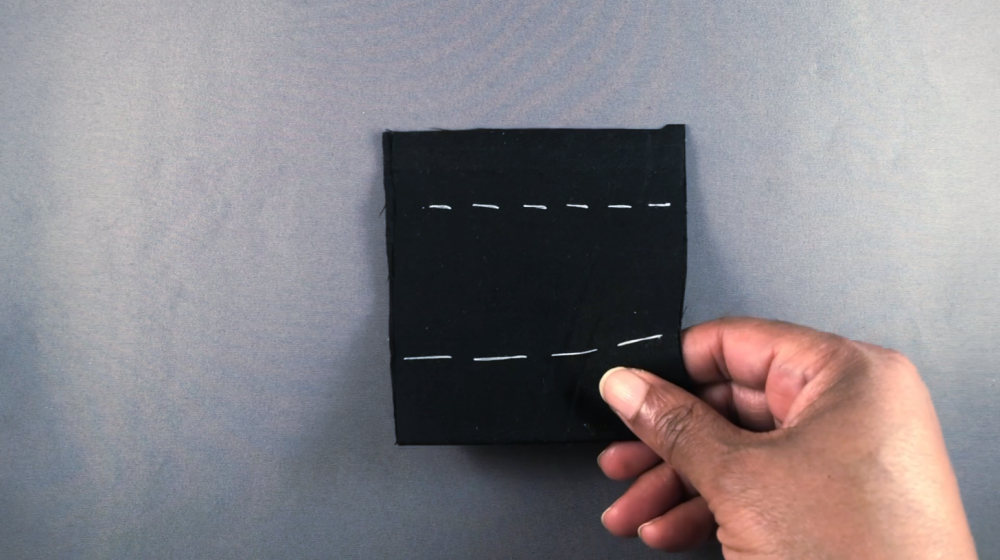
- Backstitch: This little stitch might sound complicated, but it’s like having a trusty friend walking backwards with you, ensuring your stitches don’t unravel. It’s perfect for seams that need to be strong and secure. Start by making a running stitch, then insert your needle back into the second-to-last hole you made, going backwards one hole. Now, make another stitch forward, and keep repeating these steps, always going back one hole. Don’t worry, the e-book has detailed instructions with pictures, so you’ll be a back stitch pro in no time!
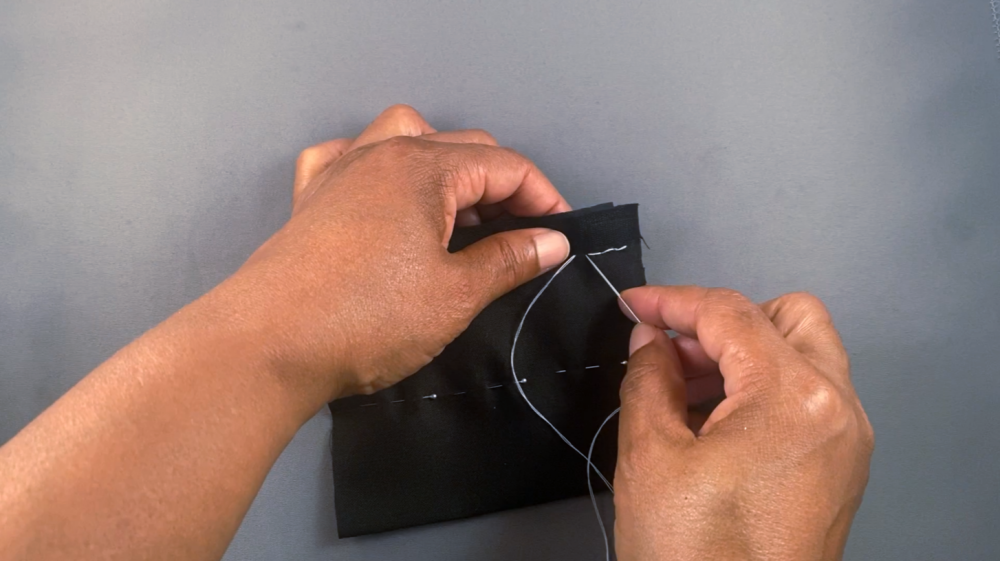
Here are some other essential hand stitches you’ll use frequently:
– Basting Stitch: This temporary stitch is a valuable tool for holding fabric in place before permanent sewing, as well as for gathering fabric.
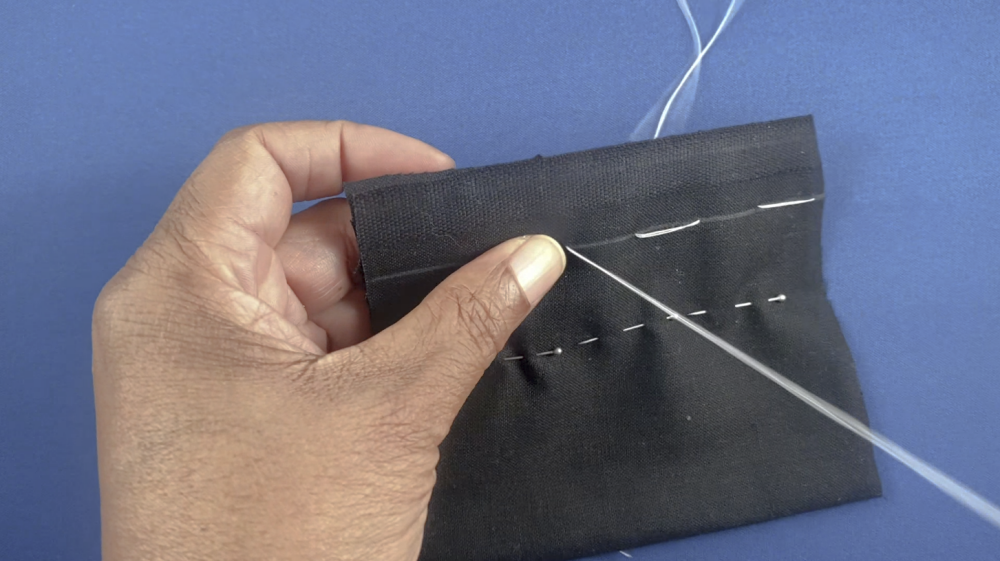
– Slip Stitch: A versatile technique for creating nearly invisible hems.
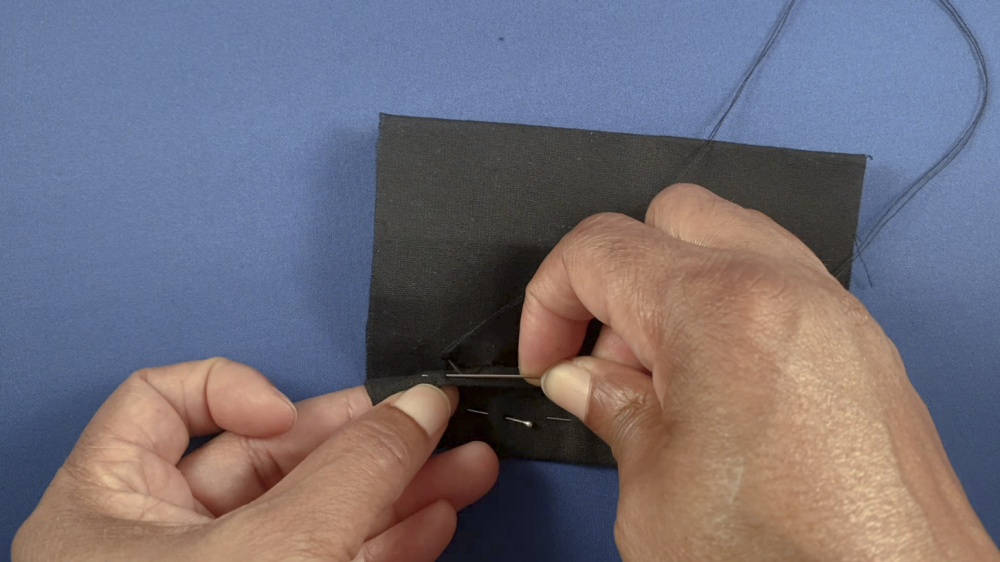
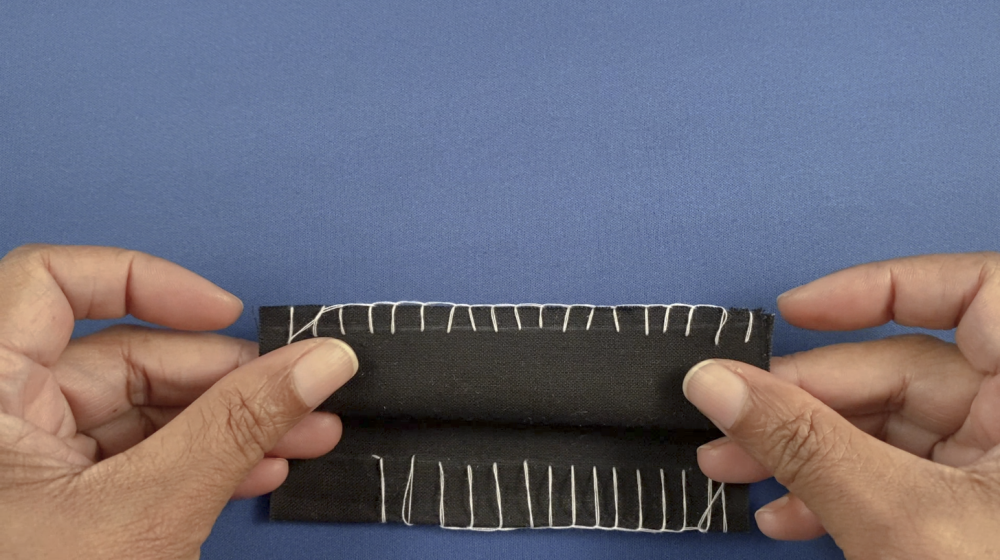
– Blanket Stitch: This decorative stitch is commonly used to finish fabric edges and is a popular choice in hand embroidery and appliqué work.
If you’re lucky enough to have a sewing machine, you’ll primarily use the straight stitch. Think of it as the reliable workhorse of sewing machine stitches, perfect for seams, hems, and pretty much anything you can imagine. Just set your machine to the straight stitch setting, choose your stitch length (around 2.5mm is a good starting point), and let your machine do the magic!
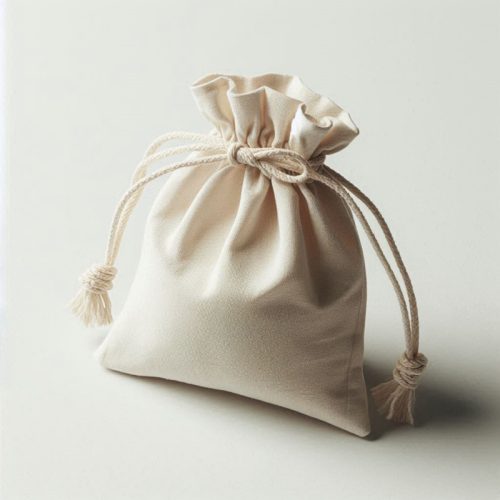
Now, to put your newfound stitching skills to the test, let’s tackle your first project: a charming drawstring pouch! It’s perfect for storing makeup, jewellery, or even your sewing essentials. Plus, it’s quick and easy to make, giving you a confidence boost for future projects.
And don’t forget to download your free e-book for even more stitches, tips, and project ideas! It’s your sewing treasure trove waiting to be unlocked.
Sew Yourself a Sweet Drawstring Pouch: A Step-by-Step Guide
Ready to turn those sewing basics into something beautiful? Let’s create a delightful drawstring pouch, perfect for stashing treasures big and small! Don’t worry, even complete beginners can whip this up in no time. So, gather your tools, grab your fabric, and let’s get stitching!
Materials:
- Fabric of your choice (cotton or linen are excellent for beginners) – around 12 inches x 18 inches
- Matching thread
- Scissors
- Ruler
- Marking pen
- Pins
- Needle (for hand sewing) OR Sewing machine
- String or ribbon (for the drawstring)
Instructions:
1. Cut your fabric: Fold your fabric in half, the right sides facing together. Use a ruler and marking pen to draw a rectangle measuring 6 inches x 9 inches on the folded fabric. Cut out the rectangle, leaving a seam allowance of around 1/2 inch around the edges.
2. Create the casing for the drawstring: Fold the top raw edge of the pouch down about 1/2 inch to the wrong side of the fabric. Iron it in place to create a crisp crease. This will be your drawstring casing.
3. Sew the sides and bottom: Now comes the stitching! If you’re hand-sewing, use a backstitch along both sides of the rectangle, starting from the bottom and leaving the top open (the drawstring casing). If you’re using a sewing machine, use a straight stitch along both sides and across the bottom, leaving the top open.
4. Turn it right side out: This is the magical part! Carefully turn the pouch right side out through the opening at the top. Push out the corners and use a blunt object like a pen to gently poke out the seams for a nice shape.
5. Make the drawstring channel: Now, let’s channel our inner engineers and create the drawstring tunnel. Fold the top raw edge of the pouch (with the casing you created earlier) down another 1/4 inch towards the inside. Iron it in place. This double fold will create a secure channel for your drawstring.
6. Topstitch the casing: Using either hand sewing or your sewing machine, stitch along the top fold of the casing, close to the edge. This will enclose the raw edge and create a neat channel for your drawstring.
7. Add the drawstring: Thread your chosen string or ribbon through the casing. You can use a safety pin to help you thread it through more easily. Once it’s all the way through, tie the ends together to create a secure closure. Voila! Your very own drawstring pouch is complete!
Tips & Tricks:
- Feeling creative? Play with different fabric colours and patterns for a unique pouch.
- Add a cute button or embellishment to the front for a personalized touch.
- Make a few pouches in different sizes for various uses – storing makeup, headphones, or even gifts!
- Don’t be afraid to experiment! Sewing is all about having fun and expressing yourself.
Now, step back, admire your beautiful creation, and feel the pride of a sewing superhero! You’ve conquered your first project, and many more exciting stitches and creations await.
Remember, the free e-book has even more project ideas and detailed instructions, so don’t hesitate to check it out!
Sewing Techniques and Tips
Now that you’ve mastered essential stitches, it’s time to explore sewing techniques and tips that will elevate your sewing skills and make your projects shine. In this section, we’ll cover everything from sewing straight seams to troubleshooting common sewing issues.
Introduction to Sewing Techniques
Sewing techniques are the building blocks of successful sewing projects. Whether you’re sewing garments, home decor items, or accessories, mastering these techniques will ensure professional-looking results. Here are some essential sewing techniques to get you started:
– Sewing Straight Seams: Achieving straight seams is essential for constructing garments and other sewing projects. Use a seam guide or markings on your sewing machine to maintain an even seam allowance.
– Sewing Curves: Sewing curves requires patience and precision. Use pins or clips to hold fabric pieces together, and sew slowly to ensure smooth, even curves.
– Clipping and Notching: Clipping and notching fabric allows seams to lie flat and prevents bulkiness. Use small scissors to carefully clip curves and notch corners before turning fabric right side out.
Tips for Sewing Success
Even experienced sewists encounter challenges from time to time. Here are some tips to help you overcome common sewing issues and achieve success in your projects:
– Pressing Seams: Pressing your seams as you sew creates crisp, professional-looking results. Use a hot iron and steam to press seams flat, following the instructions for your fabric type.
– Stay Organized: Keep your sewing space tidy and organized to maximize efficiency and minimize frustration. Use storage containers, bins, and labels to keep supplies and tools easily accessible.
– Practice Patience: Sewing is a skill that takes time to master. Be patient with yourself, and don’t be afraid to make mistakes – they’re all part of the learning process!
Troubleshooting Common Sewing Issues
Even the most experienced sewists encounter challenges from time to time. Here are some common sewing issues and how to troubleshoot them:
– Uneven Seams: If your seams are uneven, check your machine’s tension settings and stitch length. Adjust as needed and practice sewing with scrap fabric until you achieve consistent results.
– Thread Tension Problems: If you’re experiencing thread tension issues, check your machine’s tension settings and ensure that the bobbin is threaded correctly. Clean and oil your machine regularly to prevent thread buildup.
By mastering these sewing techniques and following these tips, you’ll be well on your way to sewing success. In the next section, we’ll explore beginner-friendly sewing projects to put your newfound skills to the test. Get ready to unleash your creativity and start stitching!
Wrap-Up and Conclusion:
Congratulations, sewing newbie! You’ve taken your first exciting steps into the wonderful world of needle and thread. From demystifying tools and mastering basic stitches to creating your very own drawstring pouch, you’ve already accomplished so much.
Remember, sewing is a journey, not a destination. There will be moments of frustration, tangled threads, and perhaps even the occasional seam ripper intervention. But the sense of accomplishment you feel when you complete a project, the joy of wearing something you made yourself, and the therapeutic mindfulness of stitching — these are the rewards that keep us coming back for more.
Key takeaways:
- Sewing is accessible to everyone, regardless of prior experience.
- Basic tools and stitches are easy to learn and master with practice.
- Even small projects like the drawstring pouch can build confidence and inspire further exploration.
- Sewing is more than just creating things; it’s a form of self-expression, mindfulness, and personal satisfaction.
So, dear sewing newbie, what are you waiting for? Keep that needle moving, embrace the learning process, and most importantly, have fun!
Frequently Asked Questions (FAQs)
As you embark on your sewing journey, you may encounter questions and concerns that are common among beginners. In this section, we’ll address some of the most frequently asked questions to help you navigate your sewing adventures with confidence.
Q: I’m completely new to sewing. Is this even for me?
Absolutely! This guide and the accompanying e-book are specifically designed for beginners like you. Start with the basics, practice consistently, and don’t be afraid to ask for help.
Q: What are the essential sewing supplies I need to get started?
To get started with sewing, you’ll need a few basic supplies, including needles, thread, fabric, scissors, pins, and a sewing machine (if desired). These supplies will allow you to tackle a wide range of sewing projects and develop your skills as you go.
Q: How do I choose the right fabric for my sewing project?
Choosing the right fabric is essential for the success of your sewing projects. Consider factors such as the project’s purpose, desired drape and texture, and level of difficulty. Take the time to familiarize yourself with different types of fabrics and their properties to make informed choices.
Q: What are some common sewing techniques I should learn as a beginner?
As a beginner, mastering essential sewing techniques is key to successful sewing projects. Some common sewing techniques to learn include sewing straight seams, sewing curves, pressing seams, and finishing raw edges. Practice these techniques regularly to build your skills and confidence.
Q: Can I really make clothes if I learn to sew?
Absolutely! Once you master the basics, you can progress to more complex projects like garments. Start with simple patterns and gradually increase the difficulty level as your skills improve.
Q: How do I troubleshoot common sewing issues?
Even experienced sewists encounter challenges from time to time. When troubleshooting common sewing issues, start by identifying the problem and then work through possible solutions. Check your machine’s tension settings, thread quality, and needle condition, and don’t be afraid to experiment with different techniques until you find what works best for you.
Q: Where can I find sewing patterns and tutorials for beginner-friendly projects?
There are many resources available for beginner sewists, including sewing pattern books, online tutorials, and sewing blogs. Look for patterns and tutorials that are labeled as beginner-friendly and start with simple projects to build your skills gradually.
Q: What sewing machine should I buy?
There are many great options available, and the best choice depends on your budget and needs. Do some research, read reviews, and consider starting with a basic model to learn the ropes before investing in a more advanced machine.
Q: How do I take proper care of my sewing machine?
Taking care of your sewing machine is essential for maintaining its performance and longevity. Clean and oil your machine regularly, following the manufacturer’s instructions. Keep your machine covered when not in use, and avoid exposing it to dust, moisture, and extreme temperatures.
Q: My stitches look uneven and messy. What am I doing wrong?
Practice makes perfect! Don’t get discouraged by initial imperfections. Keep practicing and adjust your technique. Also, feel free to get in touch with any questions for troubleshooting tips or specific fixes.
Q: Where can I find more sewing inspiration and patterns?
The internet is full of resources! Look for blogs, websites, and YouTube channels dedicated to sewing for beginners. There are also countless books and magazines brimming with project ideas and patterns.
Next Steps:
- Download your free e-book, “How to Sew: A Beginner’s Guide to Sewing,” for even more detailed instructions, helpful tips, and a treasure trove of bonus projects!
- Share your sewing creations on social media using the hashtag #SewingNewbie and connect with other beginners on their sewing journeys.
- Explore the vast world of sewing resources online and in libraries. Get inspired by other stitchers, discover new techniques, and expand your sewing horizons.
- Remember, the most important thing is to have fun! Embrace the learning process, and enjoy the satisfaction of creating something with your own hands!