The Loop Turner: An Essential Sewing Tool for Fabric Tubes and Straps
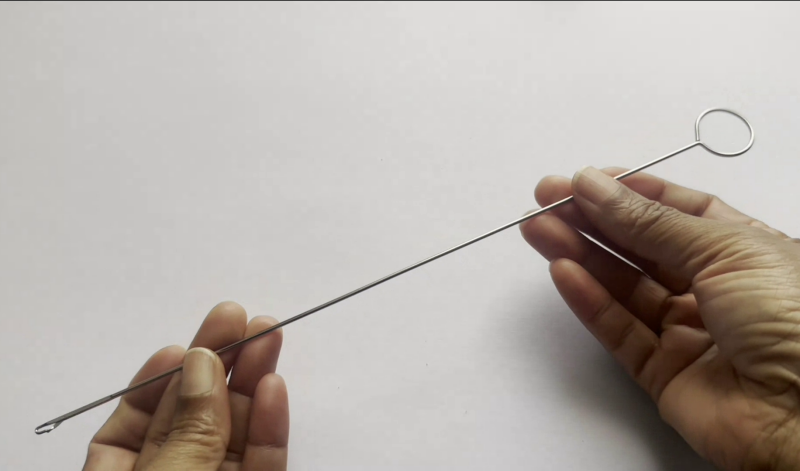
The Loop Turner
Have you ever found yourself wrestling with a long, thin tube of fabric, desperately trying to turn it right-side out? Perhaps you’ve battled with safety pins that keep unhooking, or tapestry needles that just don’t quite grab properly? If that sounds familiar, then you’re in for a treat! Today, I want to introduce you to a fantastic little sewing tool that will make turning straps, rouleau loops, and other narrow fabric tubes an absolute breeze: the loop turner, also often called a fabric turner.
This clever contraption is designed specifically to take the frustration out of this often fiddly task. Forget about those time-consuming struggles with makeshift methods! The loop turner offers a quick and efficient way to turn your fabric tubes right-side out without all the hassle. It might look a little unusual at first glance, but trust me, once you know how to use it, you’ll wonder how you ever managed without one. It’s a real game-changer for projects that involve straps, ties, or delicate little fabric loops.
Getting to Know Your Loop Turner
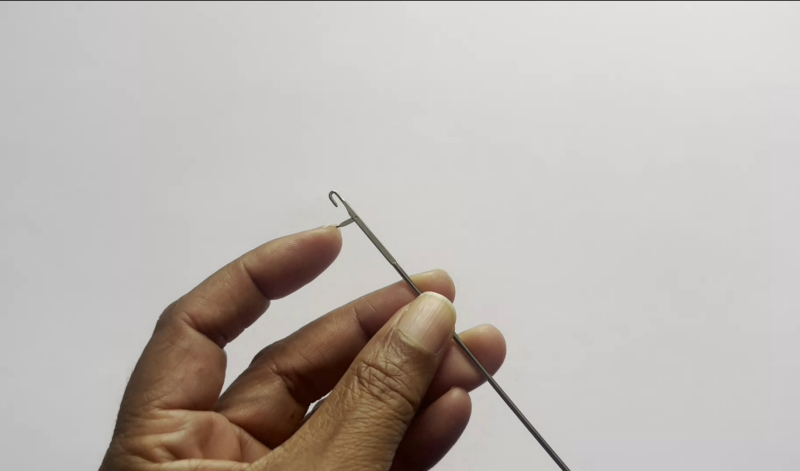
So, what exactly is a loop turner? Well, it’s typically a long, slender sewing tool, often made of metal, designed specifically for turning narrow tubes of fabric right-side out. The key feature of a loop turner is the latch hook mechanism located at one end.
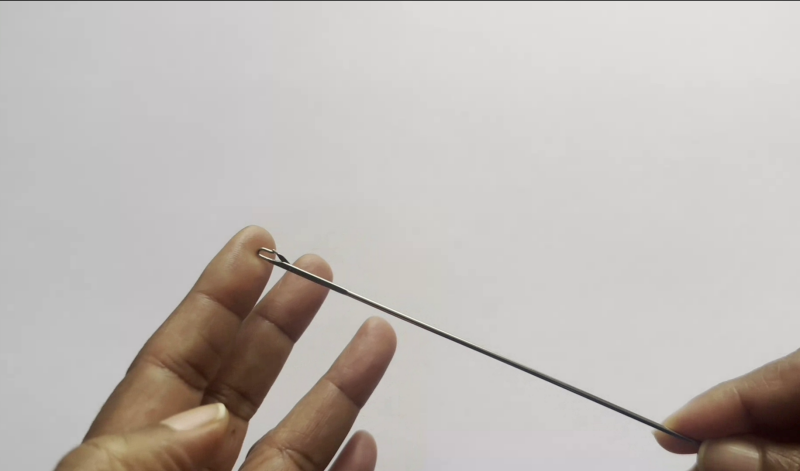
This latch hook consists of two main parts: a small hook and a movable arm or latch that opens and closes over the point of the hook. When you first look at it, you’ll notice that this movable arm sits on the outside of the hook. This is important because when you insert the loop turner into your fabric tube, this closed arm keeps the hook itself relatively smooth and prevents it from catching on the fabric as you feed it through.
The magic happens when the hook end emerges from the other end of your fabric tube. At this point, you can manipulate the movable arm to open the hook. You then use this open hook to grab onto the fabric at the end of your tube. Once the hook has a secure hold, you close the movable arm, essentially latching it onto the fabric. This secure latch is what allows you to pull the loop turner back through the fabric tube, bringing the right side of the fabric with it and turning the whole tube inside out.
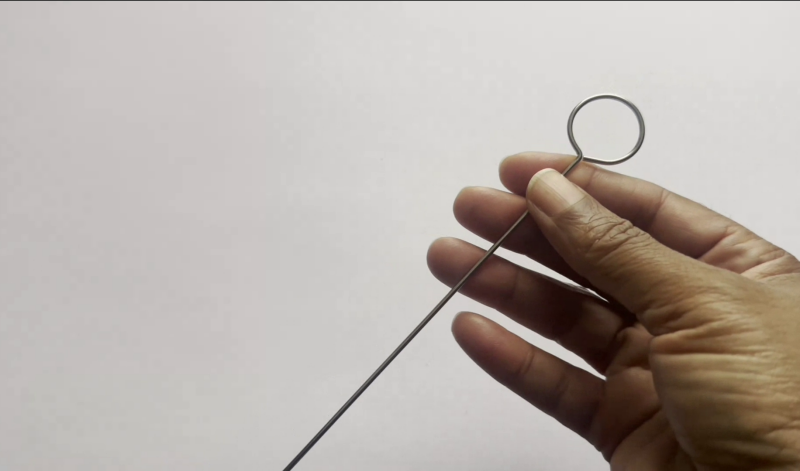
At the other end of the loop turner, you’ll usually notice a circular handle with a little open slit—I will show you what this is for later in this post.
It might sound a little complicated to describe, but once you see it in action, you’ll realise it’s a really ingenious and straightforward sewing tool specifically designed to tackle a task that can be incredibly fiddly without it. It’s definitely a case of having the right tool for the job!
Turning Rouleau Loops and Spaghetti Straps
One of the most common and oh-so-satisfying uses for a loop turner (or fabric turner) is turning those delicate rouleau loops and super-skinny spaghetti straps. If you’ve ever tried to turn these using just a safety pin or a needle, you’ll know it can be a real test of patience! The loop turner makes this process so much quicker and more efficient.
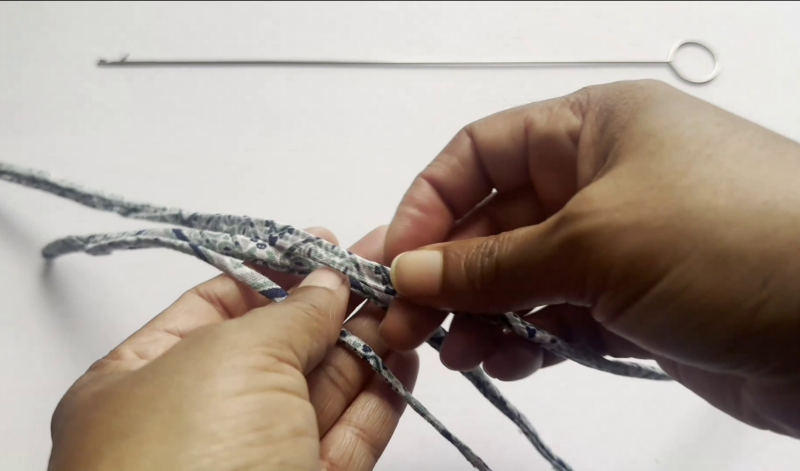
Here’s a step-by-step guide to turning these narrow fabric tubes like a pro:
- Prepare your fabric tube: First, you’ll need to cut out your fabric strip to the width you require for your loop or strap, remembering to add your seam allowance. Then, fold the fabric strip in half lengthways with the right sides facing each other and stitch along the long raw edge. Make sure your seam is secure.
- Trim the seam allowance: Next, carefully trim the seam allowance along the stitched edge of your tube. For very narrow loops, you’ll want to trim this quite close to the stitching to reduce bulk and make turning easier. Be careful not to snip your stitches!
- Introduce the loop turner: Now, take your loop turner with the latch hook end closed. Insert the closed hook end into one of the open ends of your fabric tube. Gently feed the loop turner into the tube, scrunching the fabric up along the length of the loop turner as you go. Keep pushing the loop turner through until the hook end emerges from the other open end of your fabric tube.
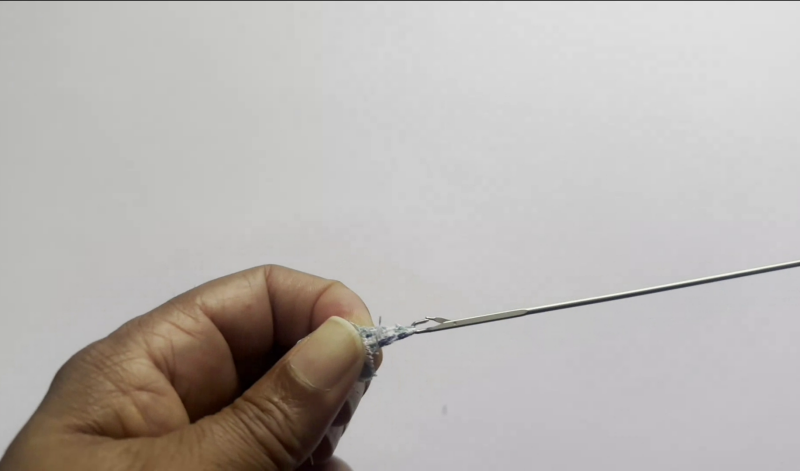
- Hook the fabric: Once the hook end is out, open the movable arm of the latch hook. Now, you need to get the hook to grab onto the fabric at the open end of the tube. You can either try to pierce the hook directly through the fabric, or, if your fabric is delicate or tightly woven, you might find it easier to make a tiny snip or hole right at the very end of the fabric tube with your scissors to give the hook a starting point. Once the hook is through the fabric, close the movable arm to latch it securely.
- Turn the tube: Now comes the magic! Holding the end of the loop turner that you first inserted, gently start to pull it down through the fabric tube. As you pull, the latched end of the fabric will be drawn back inside the tube, effectively turning the fabric right-side out. It’s really important to maintain gentle but consistent tension on both the loop turner and the fabric tube as you pull. This will prevent the fabric from slipping off the hook in the middle of the tube, which can be rather frustrating!
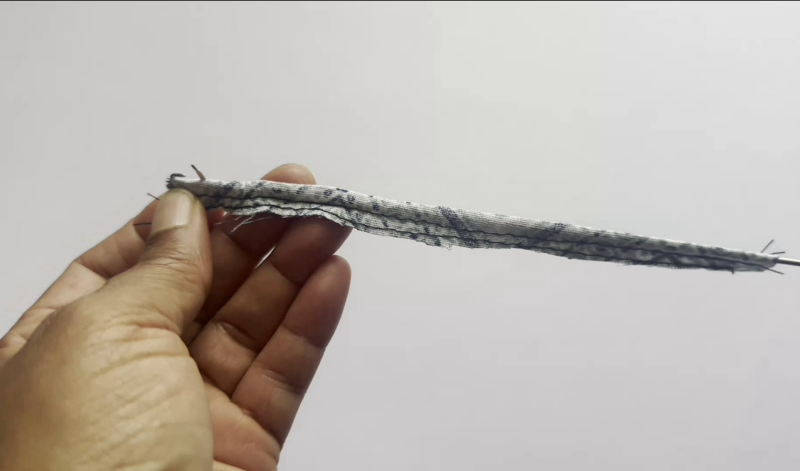
- Unhook and finish: Once the hooked end of the fabric tube starts to emerge from the other end, you can carefully open the latch on your loop turner and unhook it from the fabric. Continue to gently pull on the turned end of the fabric tube, working it along until the entire strap or loop is right-side out.
- Press: Finally, give your beautifully turned strap or loop a good press with your iron to smooth out any wrinkles and set the shape.
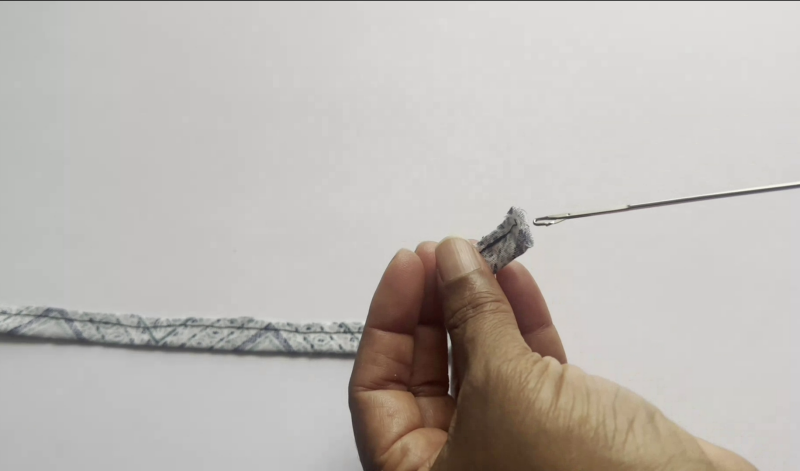
And there you have it! A perfectly turned rouleau loop or spaghetti strap, all thanks to the clever design of your loop turner. It really is the perfect sewing tool for tackling those narrow fabric tubes without the fuss and frustration of other methods.
Tips for Successful Fabric Turning
While the basic method for using a loop turner is quite straightforward, a few little tricks can make the process even smoother and help you avoid common pitfalls:
- Trim those seam allowances! As I mentioned earlier, reducing bulk inside your fabric tube is key to successful turning. After you’ve stitched your seam, trim the seam allowances as close to the stitching line as you comfortably can without snipping any stitches. This will make it much easier for the fabric to turn right-side out and will result in a neater finished strap or loop. For very narrow tubes, you might even consider grading your seam allowances – trimming one side slightly narrower than the other – to further reduce bulk.
- Angle your starting end: When you’re about to insert the loop turner, try cutting the end of your fabric tube at a slight angle. This little point can sometimes make it easier for the hook of the loop turner to emerge at the other end and grab onto the fabric. It just gives the hook a little less resistance to work against.
- Go slow and steady: Patience is a virtue, especially when you’re turning delicate or very narrow fabric tubes. Avoid yanking or pulling too forcefully on the loop turner. Instead, use a gentle, steady pulling motion. Rushing can lead to the fabric slipping off the hook or even tearing.
- A little wiggle can help: If you feel the loop turner getting stuck as you’re pulling, don’t just force it. Try gently wiggling the loop turner back and forth a little while maintaining your pulling tension. Sometimes, the fabric just needs a little coaxing to move along the loop turner. You can also try scrunching the fabric along the loop turner from the outside to help ease it along.
- Consider the length of your tool: For very long or very narrow tubes, a longer loop turner might be necessary to reach all the way through. If you find your loop turner is a bit short for the job, you might need to work in sections, carefully pulling through as much as you can and then repositioning the hook.
- Pressing can be your friend: For particularly stubborn fabrics or very narrow tubes, you might find it helpful to gently press the seam open slightly before you start turning. This can help to reduce bulk and make the turning process a bit smoother. Just be careful not to press creases into the fabric that will be difficult to remove later.
- Hook size matters: Some loop turners come with different sized hooks. If yours does, choose the hook that seems most appropriate for the thickness and weave of your fabric. A larger hook might be better for thicker fabrics, while a smaller one might be necessary for very fine fabrics or narrow tubes.
By keeping these tips in mind, you’ll be well on your way to effortlessly turning out perfect fabric tubes every time with your trusty loop turner!
Using the Loop Turner For Very Long Tubes or Straps
If you’re making a very long tube or strap, here’s a hack using that circular handle I mentioned earlier.
- Insert the closed hook end into one of the open ends of your fabric tube and gently feed the loop turner in, scrunching the fabric as you go.
- When you can’t push it any further, take the end of the fabric tube that is next to the loop turner’s circular handle and work it around the handle until it comes through the little slit. You can gently pull on the fabric tube to get it through the slit opening.
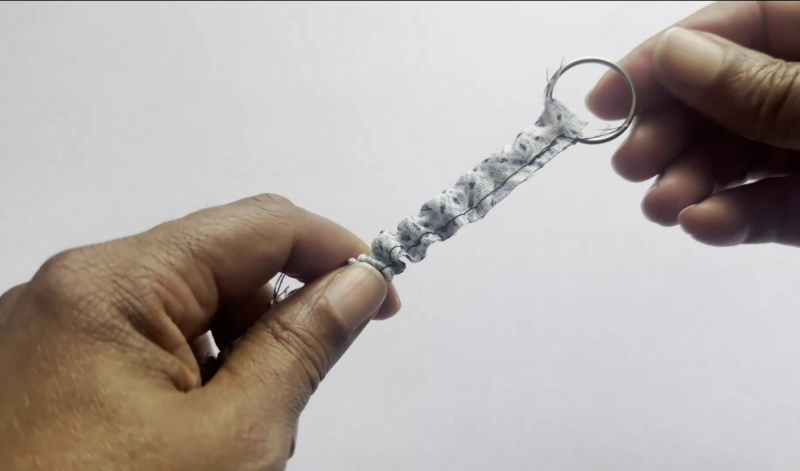
- Keep pushing the loop turner through until the hook end emerges from the other open end of your fabric tube. Once the hook end is out, attach the hook directly through the fabric and gently start to pull it down through the fabric tube.
- Once again, you will also be working the fabric around the loop turner’s circular handle.
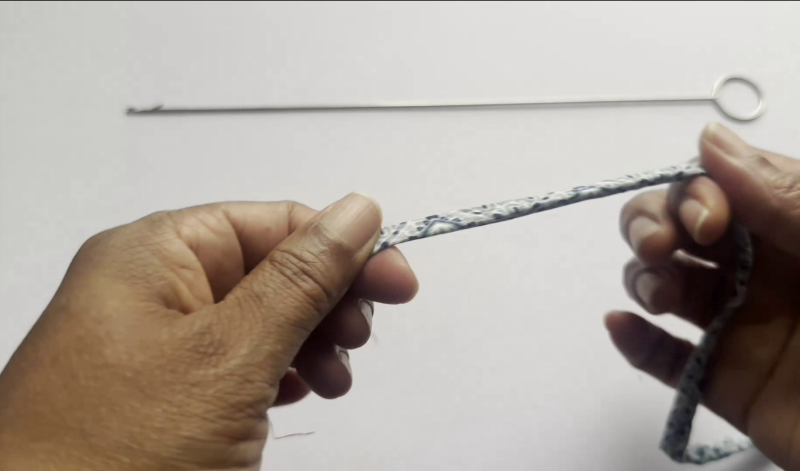
- Continue to gently pull the fabric until the hooked end of the fabric tube starts to emerge from the other end. Carefully open the latch on your loop turner and unhook it from the fabric.
- Continue to gently pull on the turned end of the fabric tube, working it along until the entire strap or loop is right-side out.
Beyond Straps: Other Uses for Your Loop Turner
While turning rouleau loops and spaghetti straps is definitely the loop turner’s main claim to fame, don’t think that’s all it can do! Here are a couple of other clever ways you can put this handy sewing tool to work:
- Turning out small embellishments: If you’re working on a project that involves creating small, narrow fabric pieces for embellishments – think tiny fabric stems for flowers or delicate little fabric tabs – your loop turner can be a lifesaver for turning these right-side out, especially if they’re too narrow to easily manipulate with your fingers. The same technique you use for straps will apply here, just on a smaller scale.
- Creating fabric-covered cording or rouleau for button loops or trim: If you’re making your own fabric-covered cording or rouleau for things like button loops or decorative trim, the loop turner is an essential sewing tool. You stitch your fabric tube around your cording (or without cording for a soft rouleau) and then use the loop turner to pull the fabric right-side out, encasing the cording beautifully. This gives you perfectly matching trim or functional button loops made from your project fabric.
- Potentially assisting with very narrow elastic or cord: While a dedicated sewing bodkin with a secure clasp is generally the best sewing tool for threading elastic or cord through a casing, in a pinch, and if your elastic or cord is very narrow and has a loop or eyelet, you might be able to use the hook of your loop turner to carefully pull it through a short casing. However, you’ll need to be very careful to ensure the elastic or cord doesn’t slip off the hook mid-way. For most elastic and cord threading, a ballpoint bodkin or a bodkin with a wider eye is usually a more reliable choice.
So, while its primary function is definitely turning those narrow fabric tubes, don’t be afraid to think outside the box and see if your loop turner can lend a hand with other fiddly turning or threading tasks in your sewing room!
Caring for Your Loop Turner
Your loop turner is a pretty robust sewing tool, and thankfully, it doesn’t require a lot of special care to keep it working effectively for years to come. A few simple habits will ensure it remains a reliable friend in your sewing kit.
The main thing to keep in mind is to keep it clean and free from any stray threads or debris. After you’ve finished using it, just give it a quick wipe down with a soft, dry cloth. If it gets a bit dusty or you notice any threads caught in the hook mechanism, you can use a small brush or even a pin to gently remove them.
When you’re not using your loop turner, it’s best to store it safely with your other sewing tools. Because it’s often long and relatively thin, you’ll want to avoid bending it. Keeping it in a dedicated drawer, a notions case, or even a tool roll will help to protect it and ensure it’s ready to go whenever you need it.
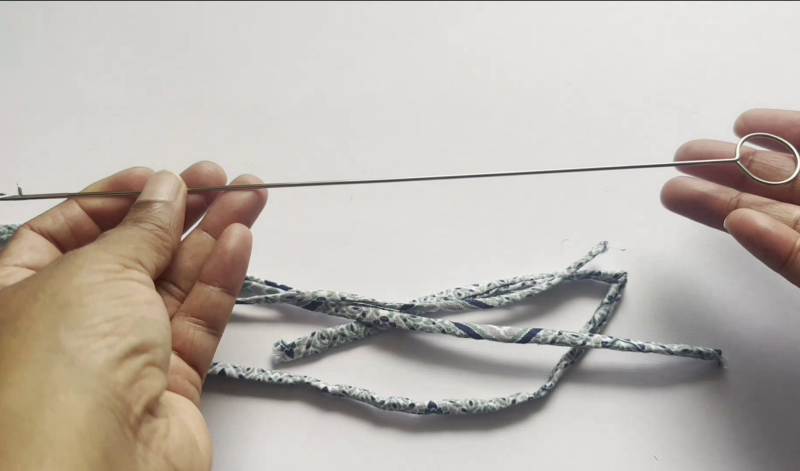
Because it’s usually made of metal, it’s a fairly durable sewing tool and should withstand regular use for a good long time with just a little bit of care. So, a quick clean now and then and careful storage are all you really need to do to keep your loop turner in perfect working order!
FAQs
Now, even after all this useful information, it’s perfectly normal to still have a few little questions popping into your head! So, I’ve gathered some of the frequently asked questions about using a loop turner, and hopefully, these answers will provide all the clarity you need!
Is a loop turner the same as a fabric turner?
Yes, absolutely! The terms “loop turner” and “fabric turner” are generally used interchangeably to refer to the same sewing tool designed for turning narrow tubes of fabric right-side out. You might hear one term more than the other depending on where you are or who you’re talking to, but they both mean the same thing.
Can I use a safety pin instead of a loop turner? What are the drawbacks?
While you can technically use a safety pin to turn fabric tubes, it’s often much more fiddly and time-consuming than using a loop turner. Safety pins can easily unhook from the fabric, get stuck inside the tube, or even damage delicate fabrics. The loop turner’s latch hook is specifically designed to grip the fabric securely and glide through the tube more easily.
What if my fabric keeps slipping off the hook?
If your fabric keeps slipping off the hook of your loop turner, make sure the movable arm is fully closed and latched securely onto the fabric. You might also need to ensure you have a good grip on the loop turner and are pulling with consistent, gentle tension. If the fabric is very slippery, you could try making a slightly larger hole for the hook to grab onto, or even try hooking a small double thickness of the fabric.
Can I use a loop turner for very thick fabrics?
While a loop turner can be used for thicker fabrics, you might find it more challenging, especially if the tube is also very narrow. The bulk of the fabric can make it difficult to pull through. In these cases, you might need to work very slowly and gently, and ensure your seam allowances are well-trimmed. For extremely thick fabrics, you might need to explore alternative turning methods.
Where can I buy a loop turner or fabric turner?
You can find loop turners (or fabric turners) at most haberdasheries, craft shops, and online retailers that specialise in sewing tools and supplies. They are generally quite affordable and are a worthwhile investment for anyone who frequently works with straps or narrow fabric tubes.
Hopefully, these answers have helped to clear up any lingering questions you might have about using your wonderful loop turner!
Conclusion
So there you have it! The loop turner, a seemingly simple yet incredibly effective sewing tool that can truly transform the often-fiddly task of turning narrow fabric tubes into a breeze. Whether you’re crafting delicate spaghetti straps, sturdy bag handles, or intricate rouleau loops, this clever contraption will save you time, frustration, and the occasional battle with a stubborn safety pin.
For anyone venturing into the world of sewing, or for those who’ve been stitching for a while but haven’t yet discovered the joy of a loop turner, I wholeheartedly recommend adding this little gem to your collection of sewing tools. It’s one of those gadgets that, once you’ve used it, you’ll wonder how you ever managed without it. It really does make a significant difference to the ease and efficiency of projects involving turned fabric tubes.
Ready to continue building your essential sewing skills and knowledge? Download my free beginner’s guide to sewing e-book now for a comprehensive guide to all the basics and beyond!