The Ballpoint Bodkin: Your Gentle Helper for Inserting Elastics and Cords
Getting to Know The Ballpoint Bodkin
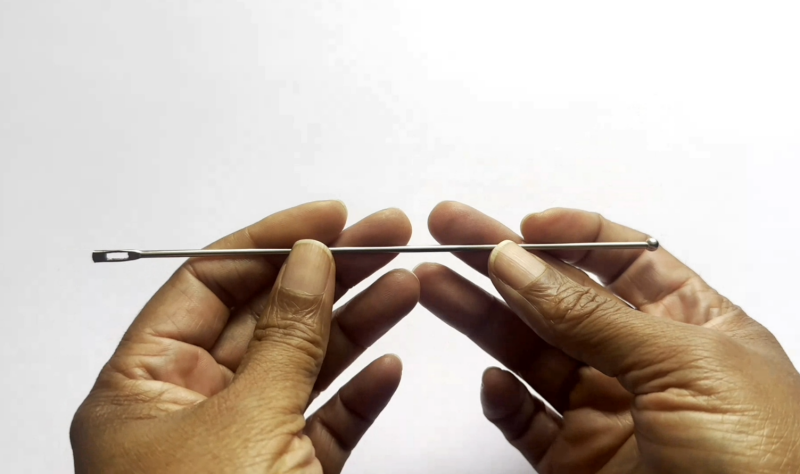
Now, you might be thinking, “A bodkin? What on earth is that?” Well, in simple terms, a sewing bodkin is a clever little tool designed to help you thread things like cord, elastic, ribbon, or other materials through narrow channels. Think about the waistband of your favourite comfy trousers or the drawstring in a hood – a bodkin is often the key to getting those through smoothly and without any fuss.
And while there are different types of bodkins out there, today I really want to shine a spotlight on the ballpoint bodkin. As the name suggests, this particular type has a lovely, smooth ball-shaped tip. This might seem like a small detail, but it makes a world of difference when you’re threading through fabric casings, as that gentle ball helps the bodkin glide through without snagging on the fabric fibres or getting caught on those pesky seam allowances inside. It’s all about a smooth and gentle journey for your cords and elastics!
But the ballpoint bodkin isn’t just a one-trick pony! As we explore further, you might be surprised at some of the other clever ways you can use this handy sewing tool in your projects.
What Exactly is a Bodkin?
The term “sewing bodkin” might sound a bit old-fashioned, and that’s because it is! In fact, the bodkin has been around for quite a while. It’s even thought that the word itself might be related to the Gaelic word for dagger, which makes a bit of sense when you consider that most bodkins are tapered to some extent at one end. This tapered shape helps you to feed the bodkin into the channel you’re working with.
At the other end of a typical sewing bodkin, you’ll usually find a hole or some other kind of mechanism – like a clamp or a large eye – that’s designed to hold onto the elastic, cord, ribbon, or whatever material you’re trying to thread through. This secure attachment is crucial to prevent your material from slipping off halfway through a long casing – something I think we’ve all experienced and would rather avoid!
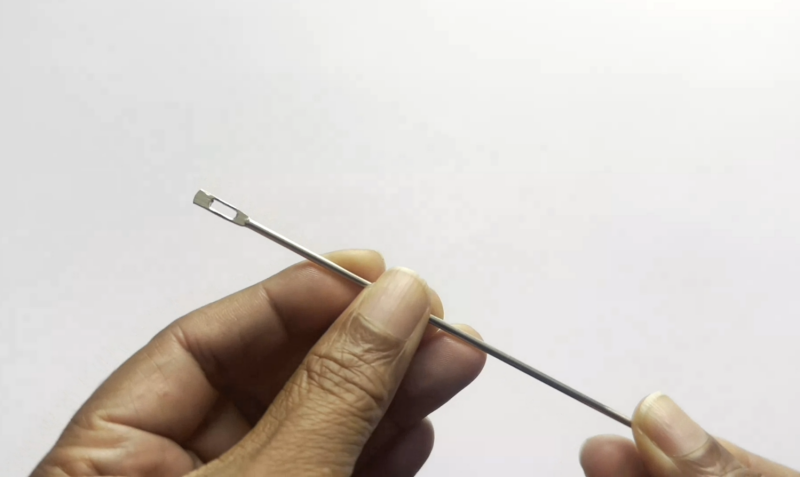
Now, let’s zoom in on the star of our show: the ballpoint bodkin. While it shares the basic tapered shape and a means of attaching your threading material, the key difference lies in its tip. Instead of a sharp or potentially snagging point, the ballpoint bodkin features a smooth, rounded ball at its leading end.
This seemingly small change is actually a stroke of genius! That gentle ball allows the sewing bodkin to slide through fabric casings much more easily. It glides over the little bumps and ridges of the fabric and, most importantly, it’s far less likely to catch on the delicate fibres of your material or, even worse, snag on the seam allowances that are tucked away inside the casing.
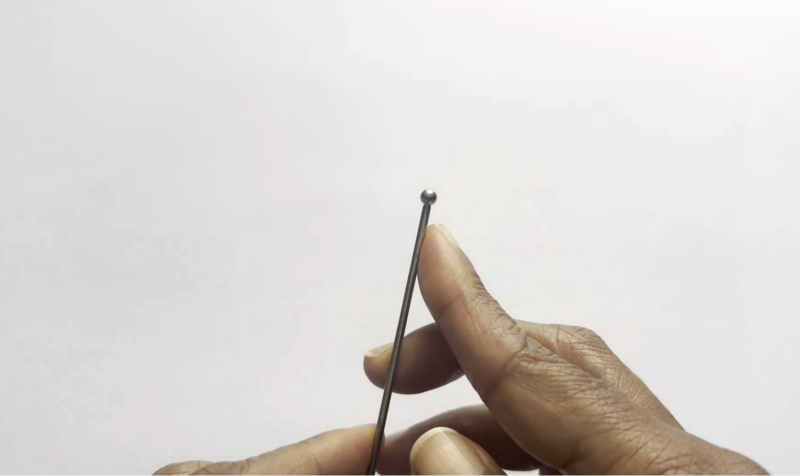
This makes the ballpoint bodkin a particularly good choice for more delicate fabrics or when you want to ensure a really smooth and snag-free threading experience. It’s all about being gentle on your lovely fabrics!
Effortless Threading Through Casings
The ballpoint bodkin truly shines when it comes to threading elastic, cords, and ribbons through those narrow channels we call casings. Whether it’s the waistband of a skirt, the edge of a hood, or the cuffs of a sleeve, this sewing tool will make the job so much easier and smoother.
Here’s a step-by-step guide on how to thread your chosen material onto the ballpoint bodkin and then guide it through a casing:
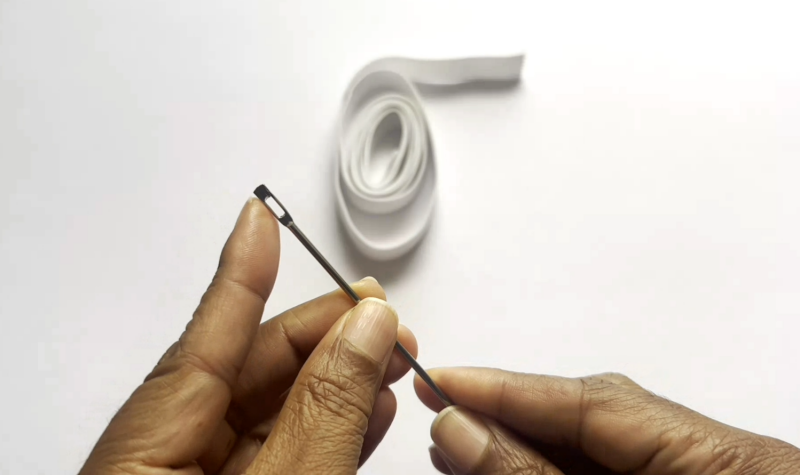
- Open the eye or attachment mechanism: Take a close look at the end of your ballpoint bodkin. You’ll see a hole (an “eye”) or perhaps a clamp or other mechanism designed to hold your elastic or cord. Open this up. If it’s a clamp, you might need to slide a ring or lever to release it.
- Secure the cord or elastic: Carefully thread the end of your elastic or cord through the eye or place it within the clamp. Make sure you have a good few centimetres or inches of the material secured to prevent it from slipping.
- Close the eye or mechanism securely: If you’re using a clamp, slide the ring or lever back to lock it firmly in place. If you’re using an eye, you might want to fold the end of your elastic or cord over on itself before threading it through the eye to create a loop that’s less likely to slip.
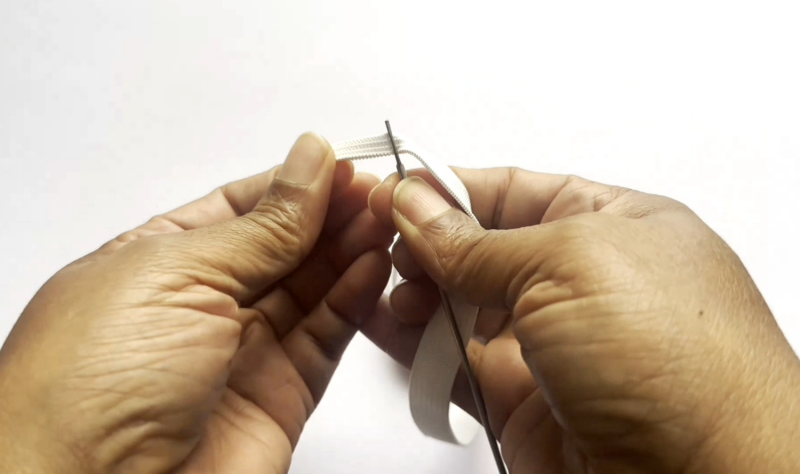
Now that your elastic or cord is securely attached, let’s get threading!
- Locate the opening of the casing: Find the starting point of the channel you want to thread through. This might be a small gap in a seam or a designated opening in a waistband.
- Insert the ballpoint end first: Gently insert the ball-shaped tip of your ballpoint bodkin into the opening of the casing.
- “Walk” the bodkin through the casing: Now, carefully and patiently “walk” the ballpoint bodkin through the casing. This means gently pushing the bodkin forward a little bit at a time, gathering the fabric of the casing along the bodkin as you go. You’ll want to keep the fabric relatively gathered around the bodkin, rather than trying to push the bodkin through a long, stretched-out section of the casing.
- Feel your way: Use your fingers to feel the position of the ballpoint tip through the fabric of the casing. This will help you to guide it along and avoid any twists or snags.
- Guide the bodkin to the other opening: Continue “walking” the ballpoint bodkin through the casing until you reach the other end and the tip emerges from the opening.
- Remove the bodkin and secure the cord or elastic: Carefully detach your elastic or cord from the ballpoint bodkin. Now, make sure you securely fasten the ends of your elastic or cord to prevent them from slipping back into the casing! You might need to stitch them in place or use a knot or other method.
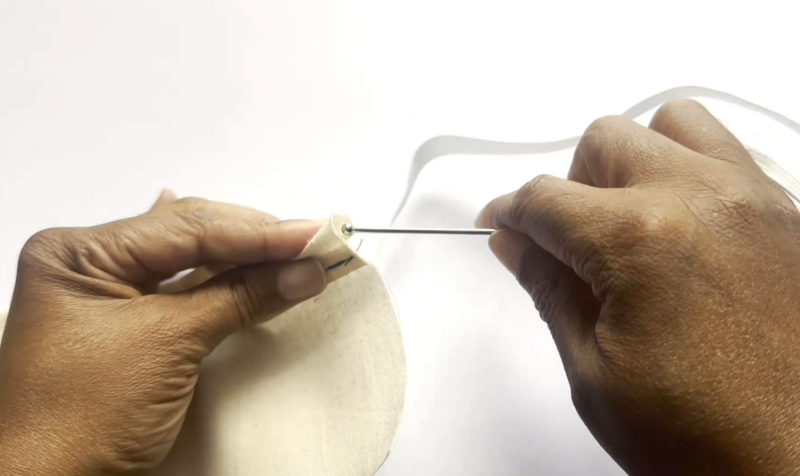
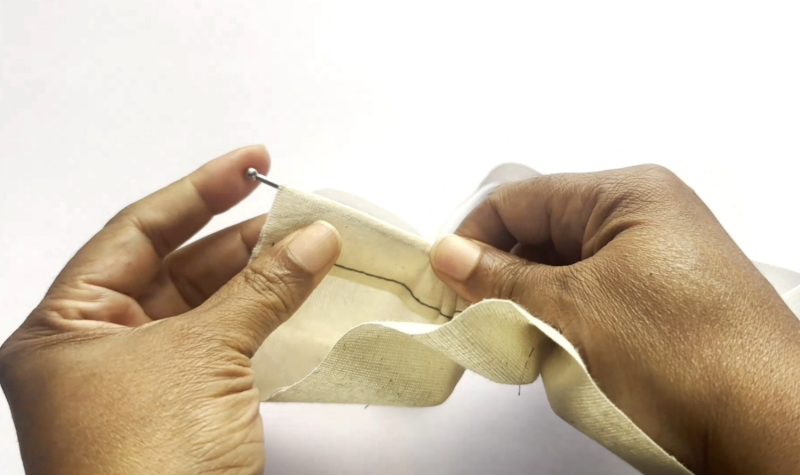
The beauty of the ballpoint bodkin, as I mentioned earlier, is that smooth, rounded tip. It really does make a difference! It glides through the casing much more easily than a sharp point, and it’s far less likely to snag on the fabric or those pesky seam allowances that are tucked away inside. This means a smoother, less frustrating threading experience for you, and a lower risk of damaging your lovely fabrics.
A Clever Appliqué Technique
If you’ve ever dabbled in appliqué, you’ll know that sometimes you want to create shapes that have beautifully clean edges with no visible stitching. One way to achieve this is to stitch your appliqué pieces right sides together with a backing fabric (often with fusible interfacing for stability), leaving a small opening, and then turning them right-side out.
However, those small, intricate shapes can be a real challenge to turn! This is where your ballpoint bodkin, along with a simple drinking straw, can become a surprisingly helpful sewing tool.
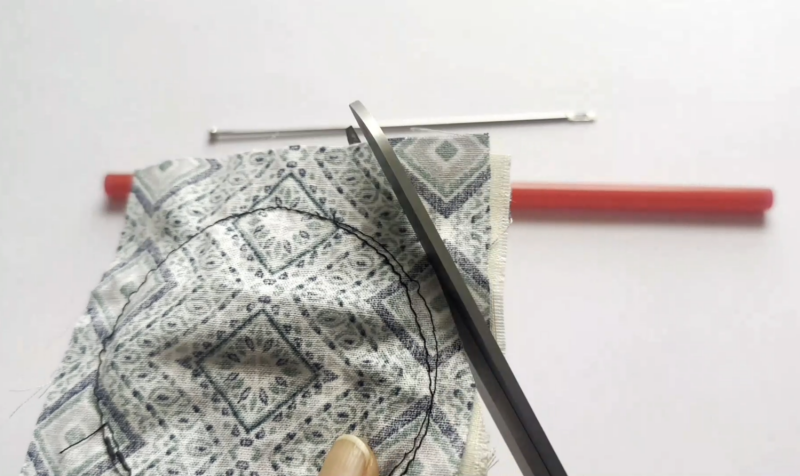
Here’s a step-by-step guide on how to use this technique:
- Prepare your appliqué piece: Cut out two identical shapes from your chosen fabrics. If you want to add some stability, you can fuse lightweight interfacing to the wrong side of one of the fabric pieces. Place the right sides of your two fabric pieces together and pin them securely around the edges.
- Stitch around the edges: Using your sewing machine, stitch around the entire edge of your appliqué shape, and remember to backstitch at the end!
- Trim the seam allowance: Carefully trim the seam allowance around your stitched shape, especially at any curves or points. This will help your appliqué lie flat and have cleaner edges when turned. Next, make a small slit, leaving a small 1-2 cm opening, in the centre of the back fabric or interfacing. This slit will be your turning opening.
- Introduce the straw: Take a regular drinking straw and position one end of it directly over the small slit you left in your stitched appliqué piece, on the side of the fabric that will be the inside (the wrong side). Think of the straw acting like a little drum or tunnel over the opening.
- Insert the ballpoint bodkin: Now, take the ballpoint end of your ballpoint bodkin and gently push it down into the opening of the straw. As you push, you’ll start to see the fabric of your appliqué being pushed up and through the straw, beginning to turn right-side out.
- Guide the fabric: Carefully pull the fabric out of the straw and begin using your fingers to continue turning the fabric right-side out. You might need to work in small increments, gently manipulating the fabric with your fingers as you go. If the fabric gets a bit stuck, you can gently wiggle the ballpoint bodkin through it or try re-inserting it at a slightly different angle.
- Repeat if necessary: For smaller or more intricate shapes, you might need to repeat this pushing and guiding process a couple of times until the entire appliqué piece is turned right-side out. The straw provides a stable tunnel to work through, and the smooth ballpoint end of the sewing bodkin helps to ease the fabric through without snagging.
- Refine the edges: Once your appliqué piece is fully turned, you can use your fingers to gently push out all the edges and points. For really crisp edges, you can use the sharper end of your sewing bodkin (if it has one) or another blunt sewing tool, like a point turner, to carefully run along the inside of the edges, smoothing them out.
- Press: Finally, give your turned appliqué piece a good press with your iron to flatten it and set the shape. You can then stitch it onto your project using your preferred appliqué method, and your raw edges will be neatly hidden inside!
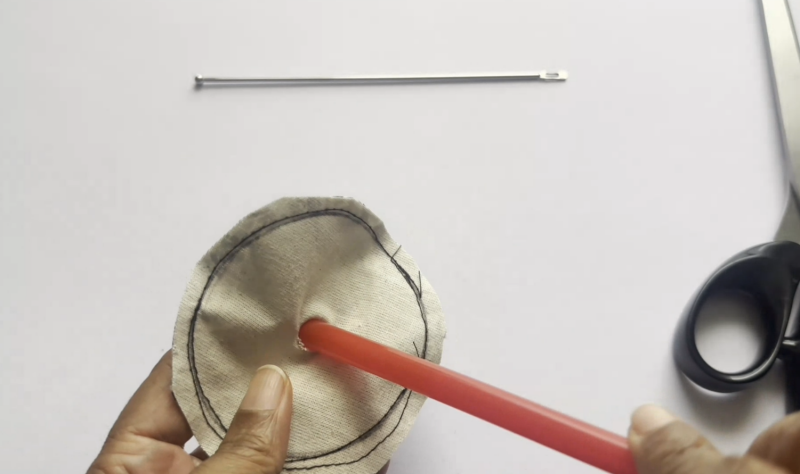
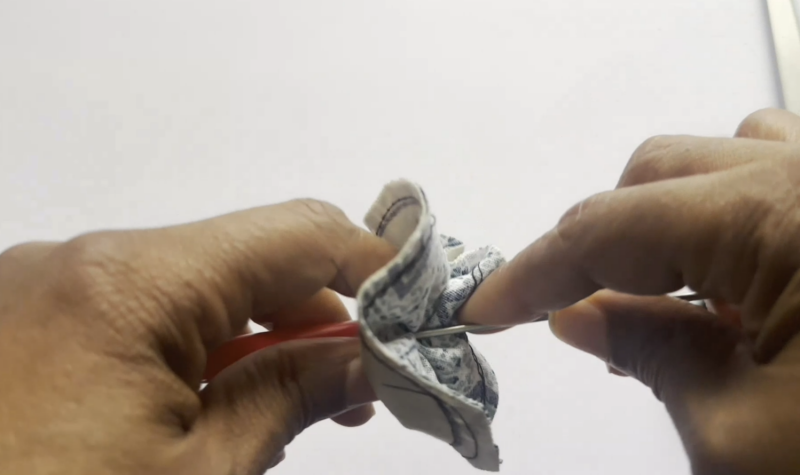
This clever little trick shows just how versatile your ballpoint bodkin can be, going beyond just threading casings to help with other delicate sewing tasks!
A Quick DIY Sewing Bodkin
We’ve all been there, haven’t we? You’re in the middle of a project, you need to thread some elastic or cord, and suddenly, your favourite sewing bodkin has gone walkabout! In those moments of sewing desperation, fear not, because you can actually fashion a temporary, albeit less efficient, sewing bodkin using something you likely have in your sewing tools box: a large safety pin.
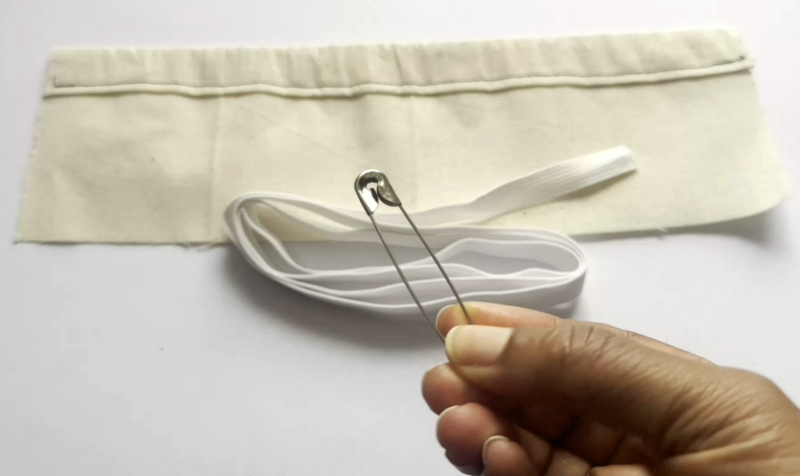
While a DIY safety pin bodkin won’t be as smooth or as quick to use as a proper ballpoint bodkin, it can certainly get the job done in an emergency. Here’s how to make and use one:
- Choose a large safety pin: Select a sturdy safety pin that’s large enough to comfortably accommodate the thickness of your elastic or cord.
- Secure the material: Open the safety pin and carefully thread the end of your elastic or cord through the loop of the pin. Close the safety pin securely, making sure the elastic or cord is firmly held within the closed pin.
- Insert into the casing: Locate the opening of your casing and carefully insert the closed safety pin into it.
- “Inch” it through: Now, this is where it gets a little more fiddly than using a proper ballpoint bodkin. You’ll need to “inch” the safety pin through the casing. This involves moving the safety pin forward a short distance, then using your fingers on the outside of the fabric to scrunch the fabric of the casing along the safety pin. Then, slide the safety pin forward again, and repeat the scrunching motion.
- Take your time: This method requires patience and a gentle touch. Avoid pulling too hard on the safety pin, as you could potentially unfasten it or damage your fabric. Slow and steady wins the race here!
- Continue until it emerges: Keep inching and scrunching the safety pin through the casing until the closed pin emerges from the other opening.
- Remove the safety pin and secure: Carefully open the safety pin and detach your elastic or cord. As with using a regular sewing bodkin, make sure you securely fasten the ends of your material.
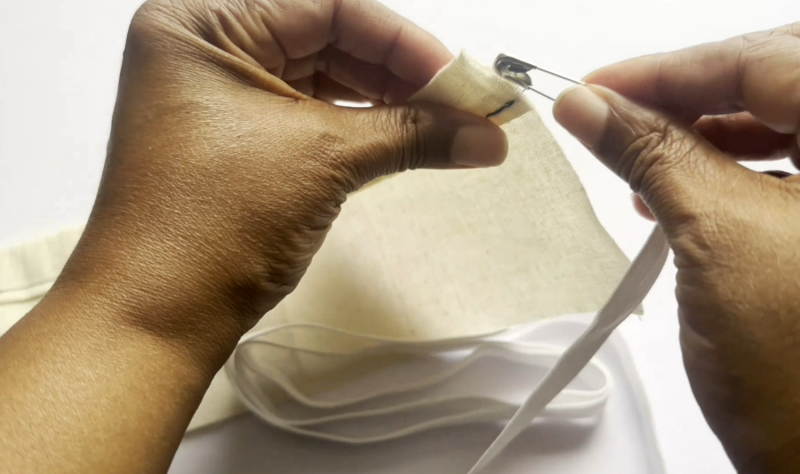
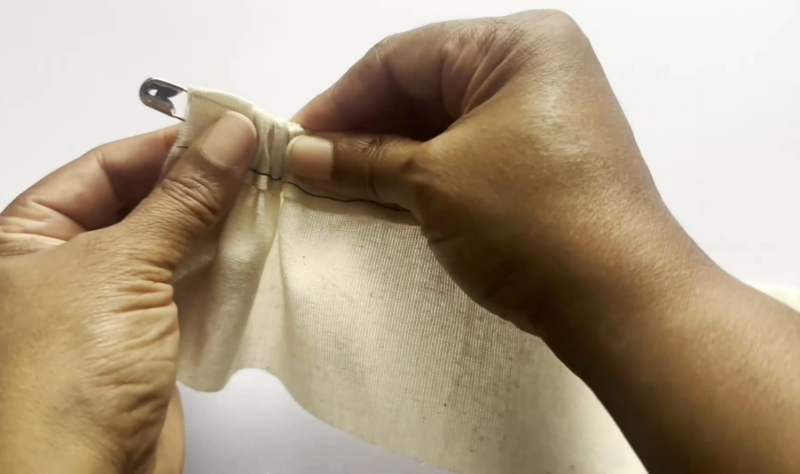
While this DIY method using a safety pin isn’t as smooth or efficient as using a ballpoint bodkin, it’s a great trick to have up your sleeve for those unexpected moments when your go-to sewing tool is nowhere to be found. It proves that even with basic supplies, you can often find a way to keep your sewing projects moving forward!
Caring for Your Ballpoint Bodkin
Your ballpoint bodkin is a pretty simple sewing tool, and thankfully, it doesn’t require a lot of maintenance to keep it working well for you. A few straightforward steps will ensure it remains a reliable companion in your sewing kit for years to come.
The most important thing is to keep it clean and free from any dust, lint, or sticky residue. After you’ve finished using it, simply wipe it down with a soft, dry cloth. If it gets a bit grubby, you can use a slightly damp cloth, but make sure you dry it thoroughly afterwards to prevent any potential rust if it has metal parts.
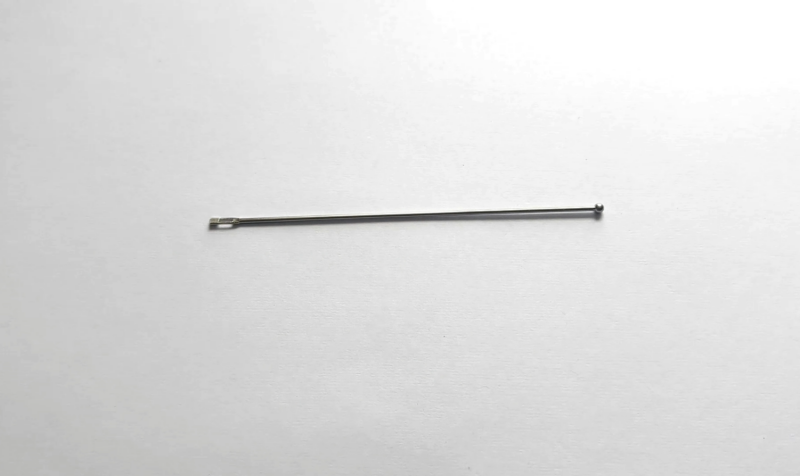
When you’re not using your ballpoint bodkin, it’s a good idea to store it safely with your other sewing tools. A dedicated drawer, a notions case, or even a small pouch will help to prevent it from getting bent or lost amongst your fabric scraps and other supplies. Because it’s usually made from durable materials like metal or sturdy plastic, it should withstand regular use for a long time with just this basic care.
So, a little wipe down now and then and keeping it stored safely – that’s all there is to it when it comes to looking after your helpful ballpoint bodkin!
FAQs
Now, even after all this useful information, it’s perfectly normal to still have a few little questions popping into your head! So, I’ve gathered some of the frequently asked questions about using a ballpoint bodkin, and hopefully, these answers will provide all the clarity you need!
What is the main difference between a ballpoint bodkin and other types of bodkins?
The key difference lies in the tip. While other bodkins might have sharper or forked ends, the ballpoint bodkin features a smooth, rounded ball at its tip. This gentle design helps it glide through fabric casings without snagging or damaging the material or catching on seam allowances inside.
Can I use a ballpoint bodkin for very delicate fabrics?
Yes, in fact, the ballpoint bodkin is often a preferred choice for delicate fabrics precisely because of its smooth, rounded tip. It’s less likely to snag or pull on fine weaves like silk or chiffon compared to a bodkin with a sharper point.
What other materials can I thread with a ballpoint bodkin?
While elastic and cords are the most common, you can also use a ballpoint bodkin to thread ribbon, lightweight tapes, or even drawstrings through various casings in your sewing projects. Its gentle nature makes it quite versatile.
My ballpoint bodkin keeps slipping off my elastic, what can I do?
Ensure that you have securely attached the elastic to the ballpoint bodkin using the eye or clamp mechanism. If you’re using an eye, try folding the end of the elastic over on itself before threading it through to create a loop that offers more grip. For clamps, make sure the locking mechanism is fully engaged. If your elastic is very slippery, you might try using a small safety pin to temporarily secure the end to the bodkin’s eye for extra hold.
Where can I buy a ballpoint bodkin or sewing bodkin?
You can find ballpoint bodkins and other types of sewing bodkins at most haberdasheries, craft shops, and online retailers that specialise in sewing tools and supplies. They are generally quite affordable and are a worthwhile addition to your sewing kit.
Hopefully, these answers have helped to clear up any lingering questions you might have about using your wonderful ballpoint bodkin!
Conclusion
So there you have it! The humble ballpoint bodkin – a seemingly simple sewing tool that can make a world of difference when it comes to threading various materials through casings in your sewing projects. Its gentle, ball-shaped tip ensures a smooth, snag-free journey for your elastics, cords, and ribbons, protecting your precious fabrics and saving you from frustrating tangles.
But as we’ve discovered, the ballpoint bodkin is more versatile than you might initially think, even lending a hand with clever techniques like turning appliqué pieces right-side out. And knowing you can even fashion a temporary bodkin in an emergency using a safety pin is a handy bit of sewing know-how to have tucked away!
Ready to continue building your essential sewing skills and knowledge? Download my free beginner’s sewing guide e-book now for a comprehensive guide to all the basics and beyond!