Conquering Your Sewing Machine: A Beginner's Guide to Essential Stitches
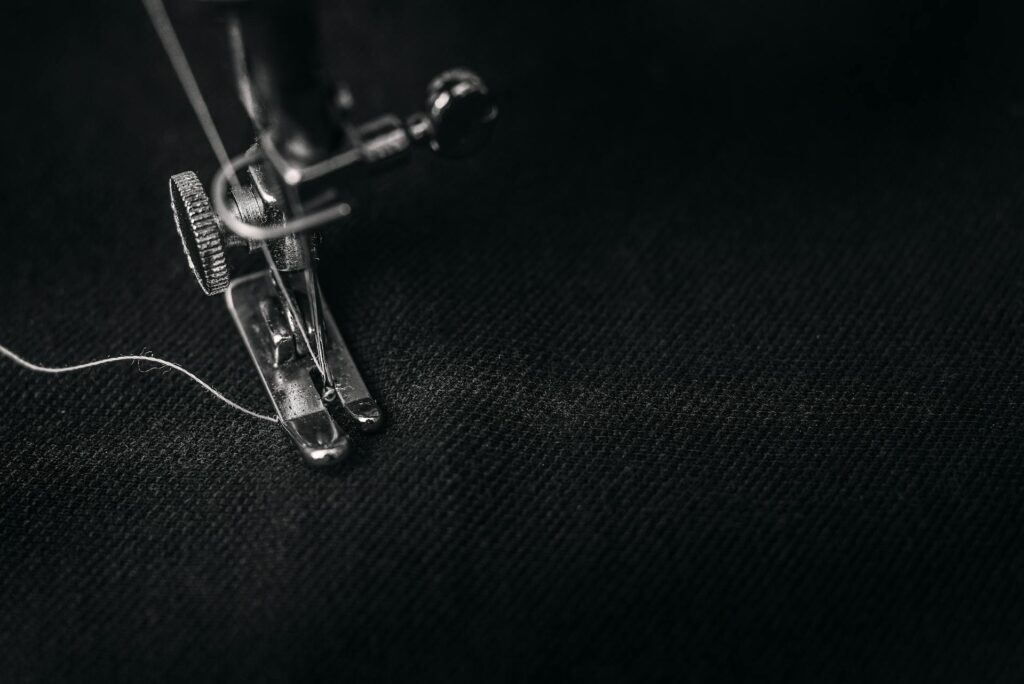
Basic Sewing Machine Stitches
So, you’ve decided to take the plunge and explore the wonderful world of sewing machines? Fantastic! There’s something truly magical about the whir of the motor and the rhythmic dance of the needle as it transforms fabric into something amazing. Whether you dream of creating your own clothes, crafting personalised gifts, or simply mending a tear in your favourite jeans, your sewing machine is about to become your new best friend.
But before you start whizzing away on your sewing machine, it’s essential to understand the basic stitches. Think of them as the alphabet of sewing. Just like you need to know your ABCs before you can write a novel, you need to master the fundamental stitches before you can tackle more complex projects. These basic stitches are the building blocks of everything you’ll create, from simple seams to intricate designs.
In this post, I’ll be your friendly guide to the essential sewing machine stitches every beginner should know. We’ll explore what each stitch is used for, how to sew it, and give you some handy tips along the way. By the end of this post, you’ll be able to confidently navigate your sewing machine and choose the right stitch for any project.
Understanding Your Sewing Machine
Before we dive into the stitches themselves, let’s take a quick peek at your sewing machine. Knowing your way around your machine is like knowing the layout of your kitchen before you start baking a cake. You wouldn’t want to be searching for the whisk while your batter is burning, would you?
Every sewing machine is a little different, so it’s always a good idea to consult your manual. It’s like the instruction booklet for a new gadget – a bit dry, perhaps, but full of essential information. However, there are a few key parts that are common to most machines, and these are the bits we’ll focus on today.
First up is the stitch selector dial. This is usually a dial or a button that allows you to choose which stitch you want to use. It’s like choosing a flavour of ice cream – the possibilities are endless! Then there’s the stitch length dial, which controls the length of each stitch. A longer stitch length is good for general sewing, while a shorter stitch length is better for delicate fabrics or for creating decorative effects.
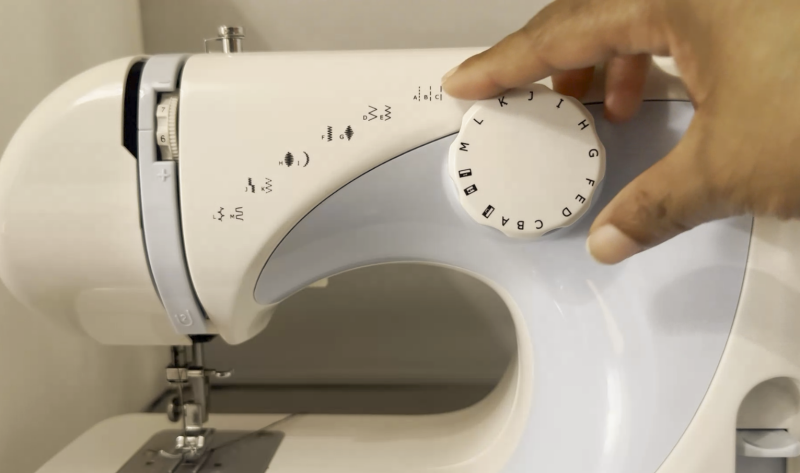
Another important thingamajig is the tension dial. This controls the tension of the thread. Getting the tension right is crucial for creating strong, even stitches. If the tension is too loose, your stitches will be floppy and weak. If it’s too tight, the thread might break. Your manual will tell you how to adjust the tension on your particular machine.
Of course, there are other bits and bobs on your sewing machine, like the needle, the presser foot, and the bobbin. We’ll touch upon these as we go, but for now, the stitch selector, stitch length, and tension dials are your new best friends.

One last thing: threading your sewing machine. This can seem a bit tricky at first, but once you get the hang of it, it’s a breeze. Your manual will have detailed instructions, and there are also loads of helpful videos online. Don’t be afraid to ask for help at your local sewing shop if you’re stuck. They’re usually happy to give you a quick demonstration.
Now that we’ve had a quick tour of your sewing machine, let’s move on to the stars of the show: the stitches themselves!
The Essential Straight Stitch
Ah, the straight stitch! This is the bread and butter of sewing, the foundation upon which all other stitches are built. It’s the first stitch you’ll learn, and it’s the stitch you’ll use most often. Think of it as the reliable workhorse of the sewing world.
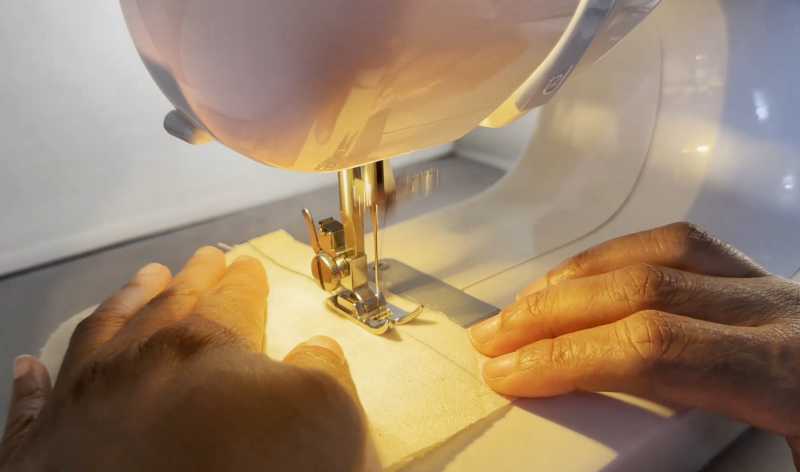
The straight stitch is exactly what it sounds like: a straight line of stitching. It’s used for joining two pieces of fabric together, creating seams, and doing all sorts of other essential sewing tasks. It might seem simple, but mastering the straight stitch is crucial for creating professional-looking projects.
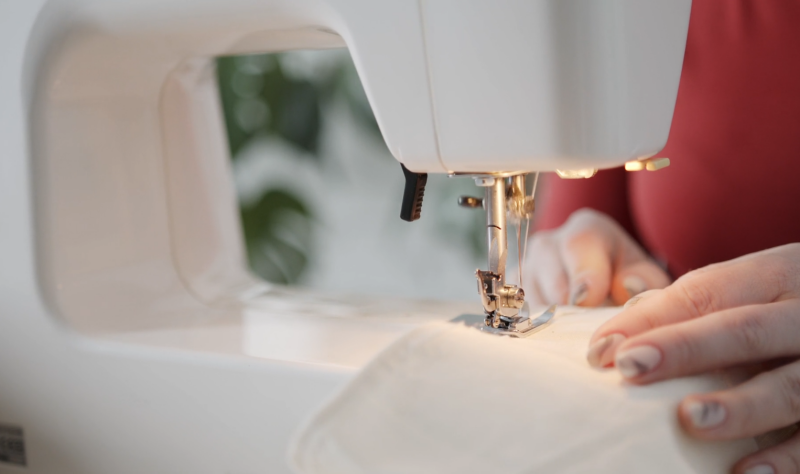
So, how do you sew a straight stitch? First, make sure your machine is threaded correctly and you’ve chosen the straight stitch on your stitch selector dial. Then, place your fabric under the presser foot, line it up with the seam allowance (the distance between the edge of the fabric and the stitching line), and gently lower the presser foot. Start sewing slowly and steadily, keeping your eye on the seam allowance and guiding the fabric in a straight line.
One of the key things to consider with the straight stitch is the stitch length. A longer stitch length is good for general sewing, while a shorter stitch length is better for delicate fabrics or for creating a stronger seam. Experiment with different stitch lengths on scrap fabric to see what works best for your project.
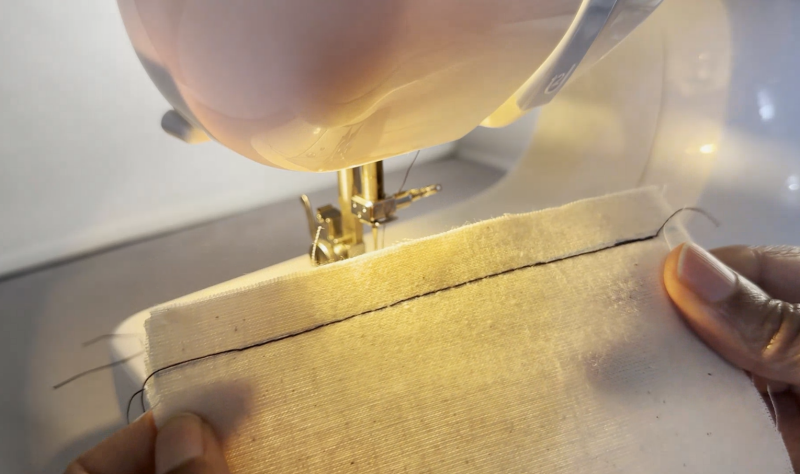
Another important tip for sewing a straight stitch is to backstitch at the beginning and end of your seam. Backstitching simply means sewing a few stitches backwards to secure the seam and prevent it from unravelling. To backstitch, sew a few stitches forward, then press the reverse button on your machine (if it has one) and sew a few stitches backwards. Then release the reverse button and continue sewing forward. Do the same at the end of your seam.
Mastering the straight stitch might seem like a small thing, but it’s the foundation of everything you’ll do on your sewing machine. Practice sewing straight lines on scrap fabric until you feel comfortable and confident. Once you’ve got the straight stitch down, you’ll be amazed at what you can create!
The Versatile Zigzag Stitch
Now that you’ve mastered the straight stitch, it’s time to explore another essential stitch: the zigzag stitch. This little wonder is incredibly versatile and can be used for a whole range of sewing tasks. It’s like the Swiss Army knife of the sewing world!
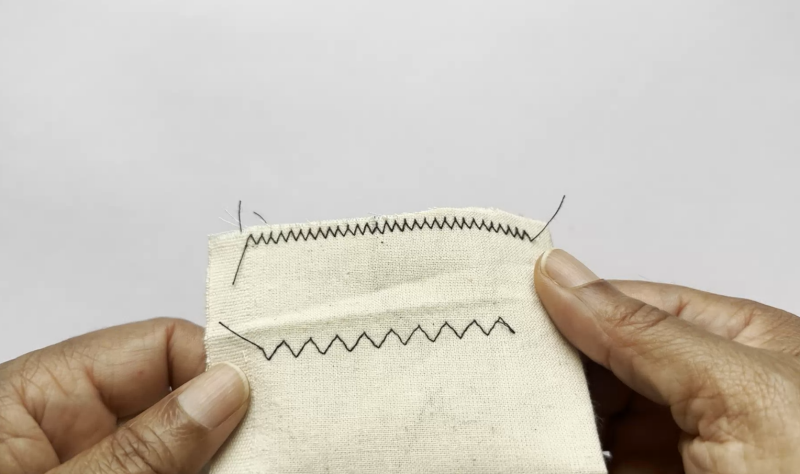
The zigzag stitch is, as the name suggests, a stitch that zigzags back and forth. It’s used for everything from finishing raw edges to creating decorative designs. One of the most common uses for the zigzag stitch is finishing raw edges. This prevents the fabric from fraying and gives your projects a professional finish. You can also use the zigzag stitch for appliqué, attaching patches or other embellishments to fabric.
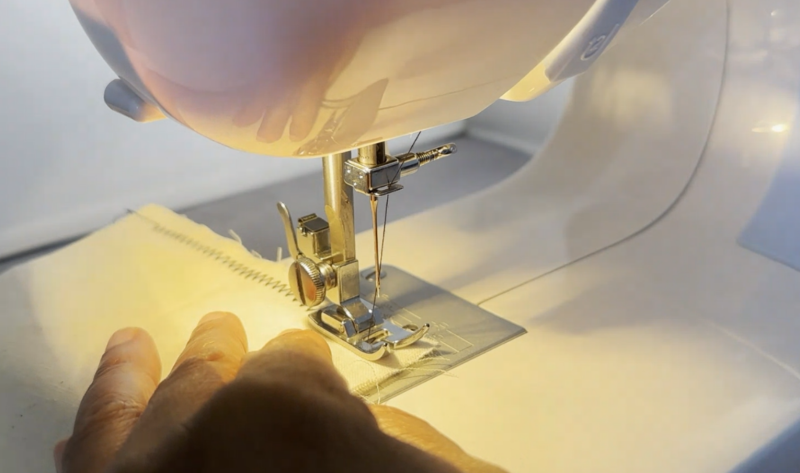
Another great use for the zigzag stitch is sewing stretch fabrics. Because the zigzag stitch has some give to it, it’s ideal for fabrics that stretch, like knit fabrics. A straight stitch on a stretch fabric can easily break, but a zigzag stitch will move with the fabric, preventing breakage.
The zigzag stitch can also be used for decorative stitching. By adjusting the stitch width and length, you can create a variety of interesting patterns. Experiment with different settings on your machine to see what you can create.
So, how do you sew a zigzag stitch? Just like the straight stitch, make sure your machine is threaded correctly and you’ve selected the zigzag stitch on your stitch selector dial. The key difference with the zigzag stitch is that you can adjust both the stitch length and the stitch width. The stitch width controls how wide the zigzag is, while the stitch length controls how close together the zigzags are.
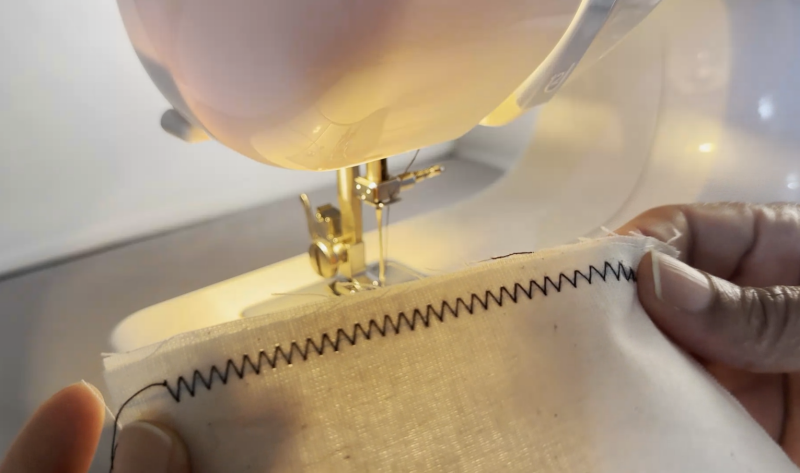
For finishing raw edges, you’ll typically want a wider stitch width and a medium stitch length. For appliqué, you might want a narrower stitch width and a shorter stitch length. And for decorative stitching, the possibilities are endless! Experiment with different settings and see what you can come up with.
Just like the straight stitch, it’s a good idea to backstitch at the beginning and end of your seam when using the zigzag stitch. This will secure the seam and prevent it from unravelling.
The zigzag stitch might seem a bit more complicated than the straight stitch at first, but with a little practice, you’ll be a zigzagging pro in no time! It’s a truly versatile stitch that will open up a whole new world of sewing possibilities.
Other Useful Basic Stitches
Now that we’ve covered the straight stitch and the zigzag stitch, let’s take a look at a few other useful basic stitches that you’ll likely encounter on your sewing machine. These stitches might not be used as frequently as the straight and zigzag stitches, but they’re still handy to know and can come in very useful for specific tasks.
Reverse Stitch: The reverse stitch is a simple but essential stitch. It’s used to secure seams at the beginning and end, just like backstitching with the straight and zigzag stitches. On most machines, you simply press a button or flip a switch to engage the reverse stitch. Sew a few stitches in reverse, then release the button or switch to continue sewing forward.
Blind Hem Stitch: The blind hem stitch is a clever little stitch that creates nearly invisible hems. It’s perfect for hemming skirts, trousers, and other garments where you don’t want the stitching to show. This stitch usually requires a special blind hem foot for your sewing machine, so check your manual for instructions on how to use it.
Buttonhole Stitch: The buttonhole stitch is used to create buttonholes. Most modern sewing machines have a built-in buttonhole function, which makes creating buttonholes a breeze. However, some machines may require a special buttonhole foot. Again, consult your manual for specific instructions.

Overlock Stitch (if applicable to basic machines): Some basic sewing machines might have a built-in overlock stitch. This stitch is used to finish raw edges and prevent fraying, similar to the zigzag stitch. However, the overlock stitch creates a more professional-looking finish. If your machine has this stitch, it’s definitely worth exploring.
Stretch Stitches (if applicable): If you plan on sewing with knit fabrics, you’ll want to explore the stretch stitches on your machine. These stitches are designed to move with the fabric, preventing breakage. Some common stretch stitches include the zigzag stitch (as mentioned earlier), the three-step zigzag stitch, and the mock overlock stitch.
These are just a few of the other useful basic stitches you might find on your sewing machine. Your manual will have more information about the specific stitches available on your machine and how to use them. Don’t be afraid to experiment with different stitches and see what they can do!
Tips for Practicing Your Stitches
Now that you’ve learned about the essential sewing machine stitches, it’s time to put your knowledge into practice. Just like any new skill, sewing takes practice. Don’t expect to be a master sewist overnight! The key is to be patient, persistent, and have fun with it.
One of the best ways to practice your stitches is to use scrap fabric. Don’t waste your good fabric on practice! Cut some squares or rectangles from old sheets, towels, or even fabric scraps you have lying around. This will allow you to experiment with different stitches and settings without worrying about ruining your precious fabric.
Start by practicing sewing straight lines. Draw some lines on your fabric with a ruler and try to sew along the lines as accurately as possible. This will help you develop your control over the machine and get a feel for guiding the fabric. Once you’re comfortable sewing straight lines, try practicing curves and corners. These can be a bit trickier, but with practice, you’ll get the hang of it.
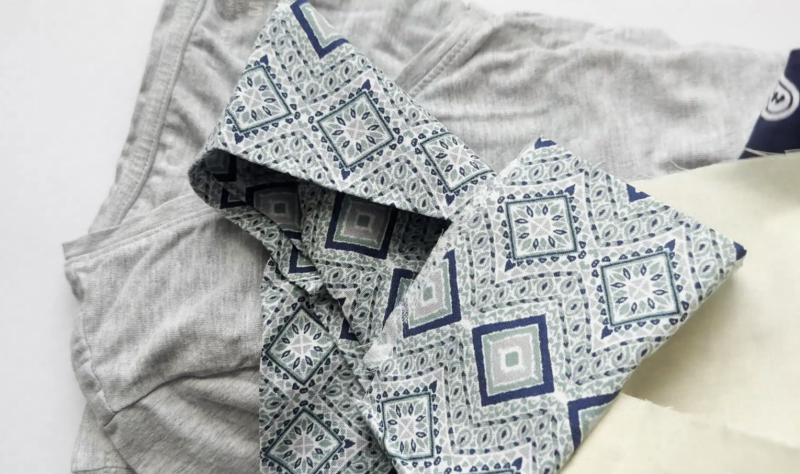
Another great practice project is to sew simple shapes, like squares, rectangles, and circles. This will help you improve your accuracy and coordination. You can even try sewing a simple sampler, where you sew different stitches and patterns on a piece of fabric. This is a great way to see what your machine can do and to experiment with different settings.
As you practice, you might encounter some common problems, such as thread breakage or skipped stitches. Don’t get discouraged! These things happen to everyone, even experienced sewists. Your sewing machine manual should have some troubleshooting tips. You can also find lots of helpful videos online that address common sewing machine problems. And if you’re really stuck, don’t hesitate to ask for help at your local sewing shop.
The most important thing is to be patient with yourself and to keep practicing. The more you sew, the better you’ll become. And remember, sewing should be fun! Don’t put too much pressure on yourself to be perfect. Just relax, enjoy the process, and let your creativity flow.
FAQs
Starting out with a sewing machine can bring up a few questions. It’s perfectly normal! So, I’ve gathered some frequently asked questions that beginners often have. Hopefully, these will help clear up any confusion and get you stitching smoothly.
What stitch should I use for sewing knit fabric?
For knit fabrics, you’ll want to use a stretch stitch. These stitches, like the zigzag stitch, the three-step zigzag stitch, or a mock overlock stitch, are designed to move with the fabric and prevent breakage. A straight stitch on a knit fabric can easily break because it doesn’t have any give.
How do I adjust the tension on my sewing machine?
The tension dial controls the tension of the thread. Getting the tension right is crucial for creating strong, even stitches. Your sewing machine manual will have specific instructions on how to adjust the tension on your machine. As a general rule, if the stitches are too loose, tighten the tension. If the stitches are too tight, loosen the tension.
What’s the difference between stitch length and stitch width?
Stitch length refers to the length of each individual stitch. A longer stitch length is good for general sewing, while a shorter stitch length is better for delicate fabrics or for creating decorative effects. Stitch width refers to the width of the stitch, particularly on zigzag and other decorative stitches. It controls how wide the zigzag or pattern is.
My thread keeps breaking, what should I do?
There are several reasons why your thread might be breaking. First, make sure your machine is threaded correctly. Second, check the tension. If the tension is too tight, it can cause the thread to break. Third, make sure you’re using the correct needle size for your fabric and thread. A needle that’s too small can also cause the thread to break. Fourth, check your needle for any damage. A bent or broken needle can also cause thread breakage. Finally, make sure you’re using good quality thread. Old or cheap thread is more likely to break.
Conclusion
So there you have it! A comprehensive guide to the basic sewing machine stitches. I hope this has demystified the world of sewing machine stitches and empowered you to start creating with confidence. Remember, mastering these basic stitches is the foundation for all your sewing adventures. From simple seams to intricate designs, knowing your way around these stitches will open up a world of possibilities.
Don’t be afraid to experiment, play around with different settings, and most importantly, have fun! Sewing is a creative journey, and the more you practice, the more you’ll discover. Each stitch is a step towards bringing your unique vision to life. So, dust off your sewing machine, thread that needle, and let your imagination run wild!
Ready to take your sewing skills to the next level? Download my free beginner’s sewing guide e-book now! It’s packed with even more helpful tips, tricks, and project ideas to get you started on your sewing journey.