The Sewing Gauge: From Hems and Pleats to Buttonholes

The Sewing Gauge: From Hems and Pleats to Buttonholes

Getting to Know Your Sewing Gauge

I want to introduce you to a real unsung hero of the sewing world: the Sewing Gauge (sometimes called a Seam Gauge). Now, you might have spotted this unassuming little ruler-like gadget in your sewing kit and perhaps wondered, “What’s all the fuss about?” Well, trust me, this isn’t just any old ruler; it’s a proper multi-tasker, a real all-in-one wonder that can take your sewing from “that’ll do” to “wow, that looks amazing!”

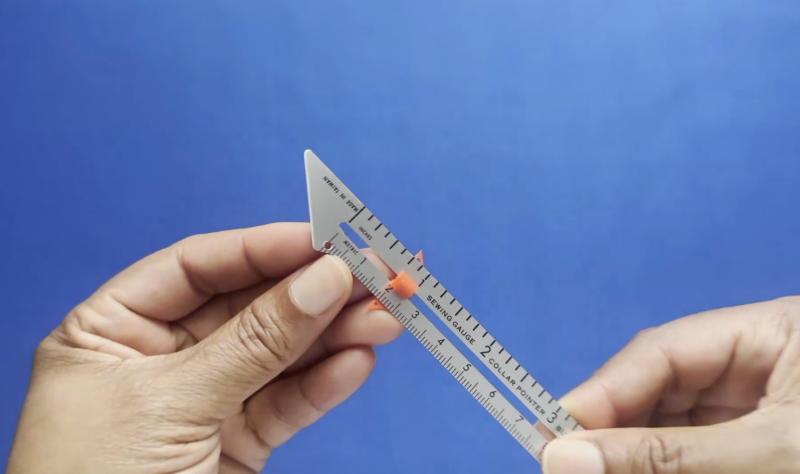
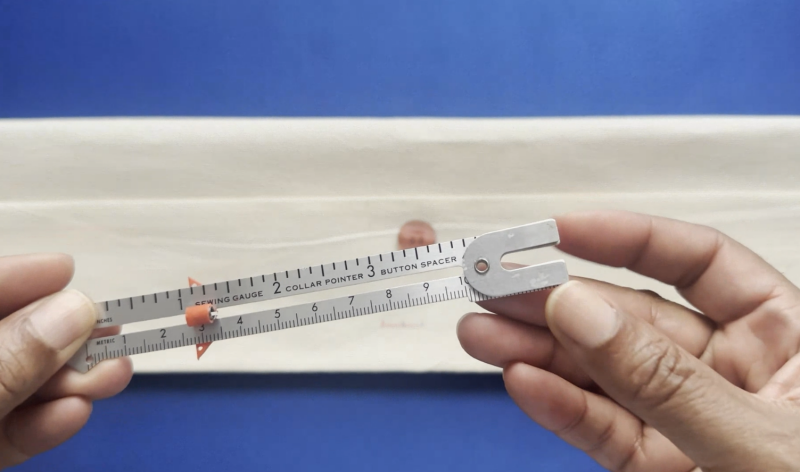
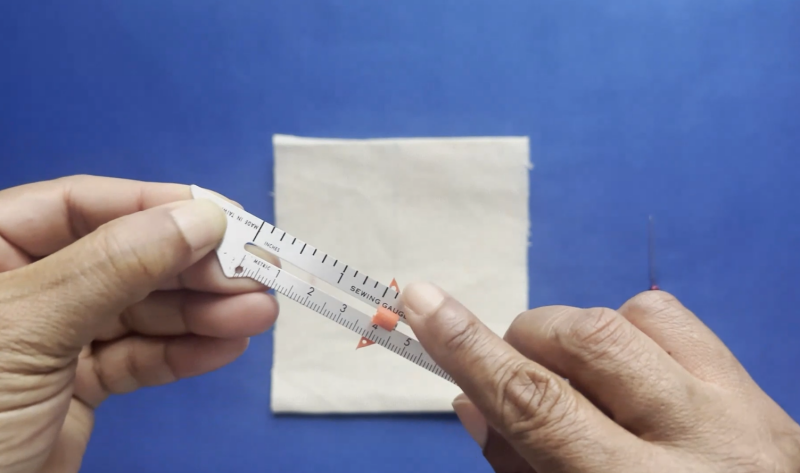
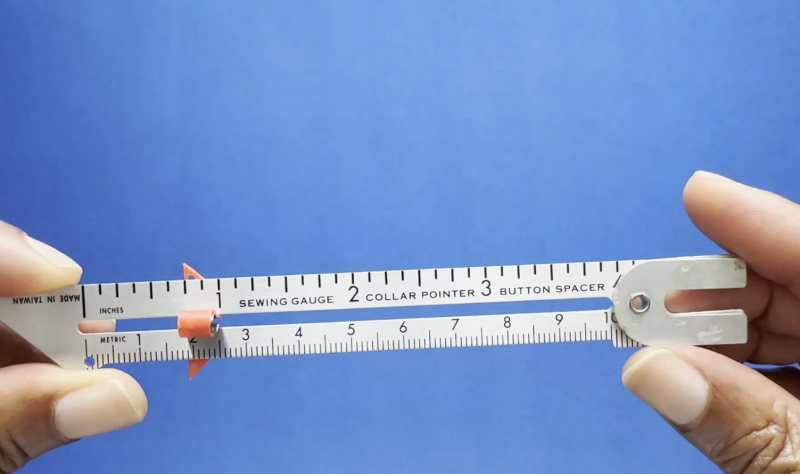
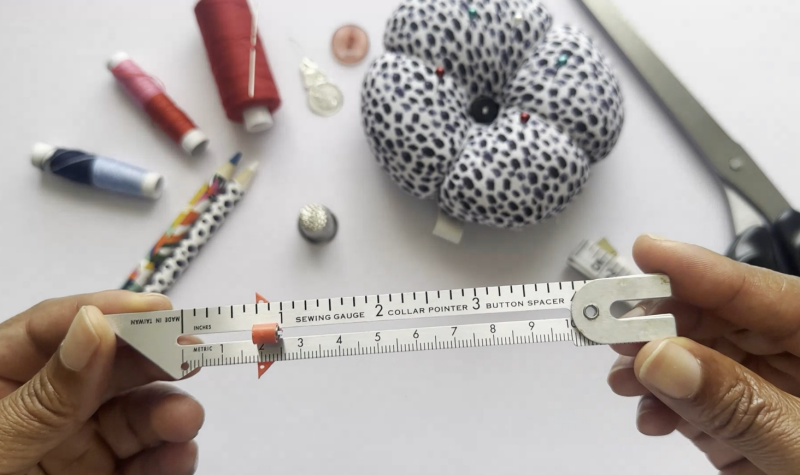
So, what exactly is a Sewing Gauge (or Seam Gauge)? Well, at its heart, it’s a small, usually metal or plastic ruler, but with a very clever twist: a sliding marker. Most sewing gauges will have markings for both inches and centimetres, which is super handy no matter which system you prefer to work with.

The real star of the show, though, is that little sliding marker. This is what makes the Sewing Gauge so much more useful than a regular ruler. You can set this marker to a specific measurement, and then you can easily and consistently measure that same distance over and over again without having to keep looking at the numbers. This is an absolute lifesaver when you’re doing things like marking a series of buttonholes or a long hem! It ensures that everything is uniform and perfectly spaced.

Now, depending on the specific sewing tool you have, you might find a few other handy features tucked away. Some sewing gauges have a shaped end that can be used as a point turner – perfect for getting those sharp corners on collars and cuffs. Others might have little raised notches along the edge, which are designed to help you create button shanks (we’ll get to that clever trick later!). And some even have a couple of tiny holes that you can use to draw perfect little circles, almost like a mini compass!

The key thing to remember is that the Sewing Gauge is all about accuracy. It’s a fundamental sewing tool that helps you transfer precise measurements from your pattern or your instructions directly onto your fabric. And in sewing, just like in baking, accurate measurements are the secret ingredient to a successful and professional-looking finished product.

Hemming Made Easy with Your Sewing Gauge

Let’s be honest, hemming can sometimes feel like a bit of a chore, but it’s absolutely essential for giving your garments and other projects a neat and professional finish. And guess what? Your Sewing Gauge is here to make the whole process so much simpler and more accurate. We want those hems to be nice and even all the way around, right? No more wobbly bottoms!

There are a couple of really straightforward ways you can use your Sewing Gauge to achieve perfectly even hem allowances:

Method 1: Marking the Hem Depth Directly

This is a super simple method, especially for shorter hems or when you just need to mark a single hemline.

  1. Decide on your hem allowance: Your pattern or instructions will tell you how deep your hem needs to be (e.g., 1 inch, 2 inches, etc.).
  2. Turn your fabric to the wrong side: This is where you’ll be doing your markings.
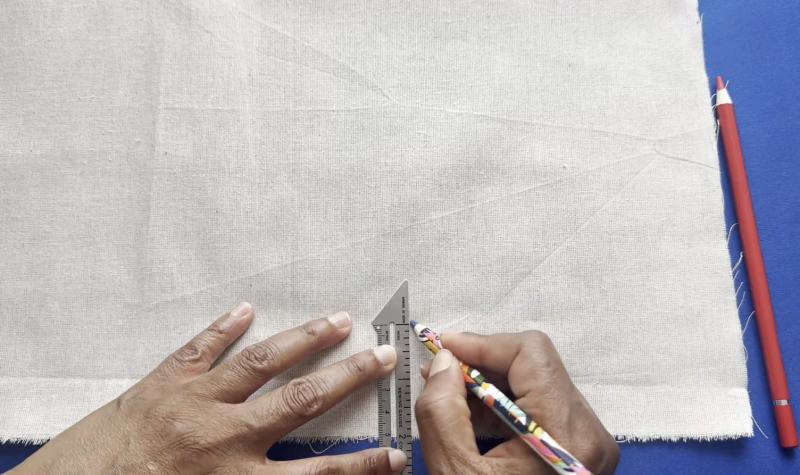
  3. Use your Sewing Gauge as a ruler: Place the edge of your Sewing Gauge along the raw edge of your fabric. Find the measurement that matches your desired hem allowance (let’s say it’s 2 inches).
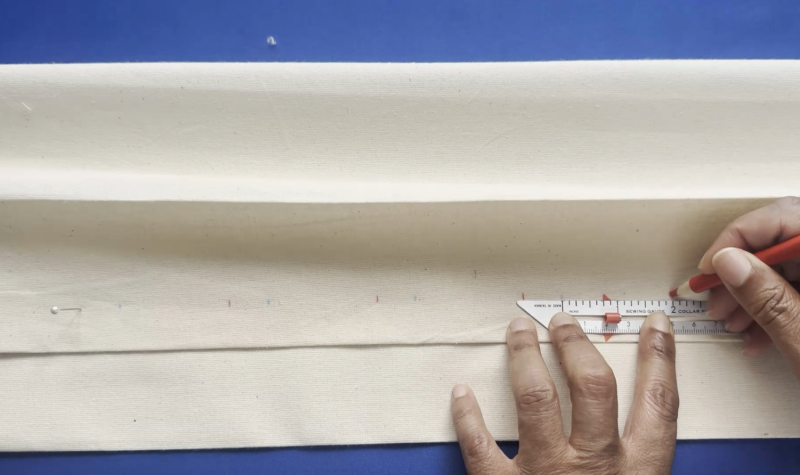
  4. Make a mark: Using a fabric marker (I really like those vanishing air pens because they disappear on their own!), make a small dot or dash on your fabric at the 2-inch mark along the edge of your Sewing Gauge.
  5. Repeat along the edge: Move your Sewing Gauge along the edge of your fabric, making a mark every few inches at the same 2-inch measurement. The more marks you make, the easier it will be to fold your hem evenly.
  6. Fold and press: Once you’ve made your row of marks, you can fold your fabric up along that line, press it with your iron to create a nice, crisp fold, and then you’re ready to stitch your hem!
Sewing Gauge: Marking the Hem Depth Directly

Method 2: Using the Sliding Marker for Consistent Hem Allowances

This method is brilliant for longer hems or when you want to be absolutely sure that your hem allowance is the same all the way around.

  1. Decide on your hem allowance: Again, check your pattern or instructions. Let’s say this time it’s one and a half inches.
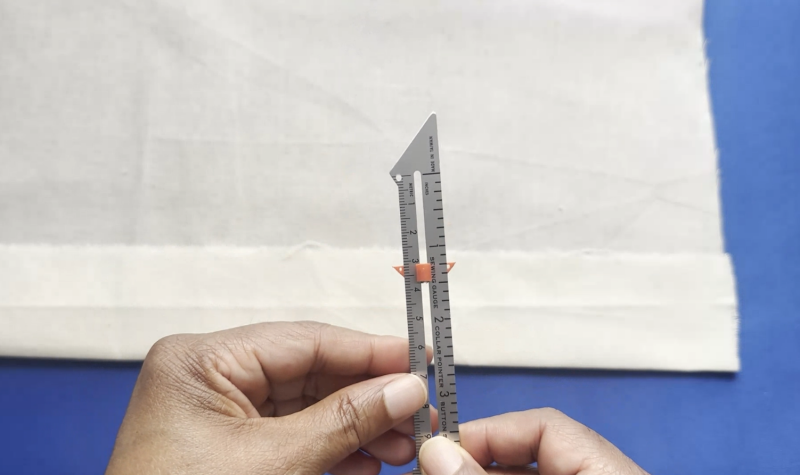
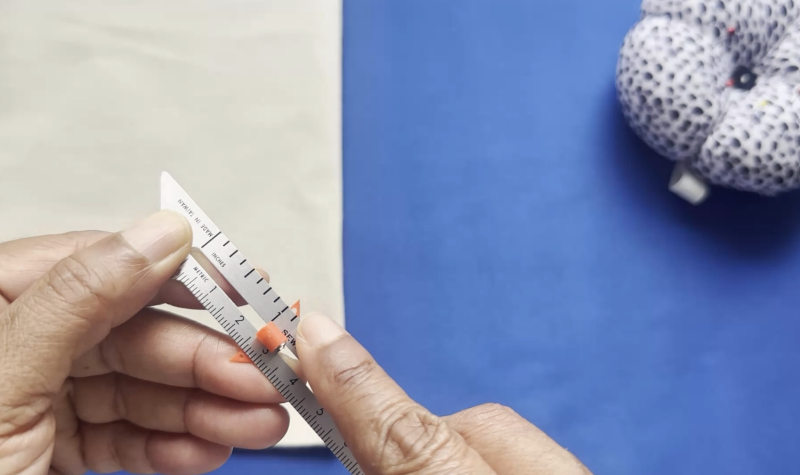
  2. Set the sliding marker: Slide the little marker on your Sewing Gauge until the edge of the marker lines up with the one-and-a-half-inch mark on the ruler part of the gauge.
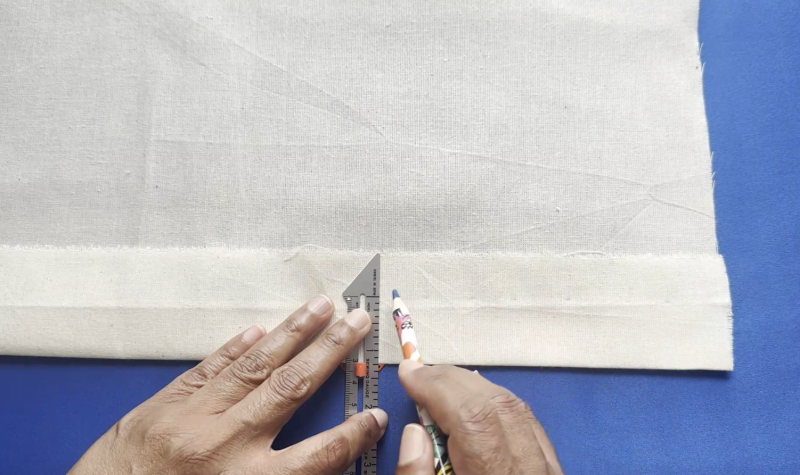
  3. Position the gauge: Place the edge of your Sewing Gauge along the raw edge of your fabric (on the wrong side).
  4. Mark along the sliding marker: Now, instead of looking at the ruler markings each time, you can simply use the edge of the sliding marker as your guide to make your marks with your fabric pen. Just run your pen along the edge of the sliding marker as you move the Sewing Gauge along the fabric edge. This ensures every mark is exactly one and a half inches from the raw edge.
  5. Fold and press: Just like before, once you have your line of marks, fold your fabric up to meet that line, press it, and stitch!
Sewing Gauge: Using the Sliding Marker for Consistent Hem Allowances

Using your Sewing Gauge for hemming really takes the guesswork out of it and helps you achieve those lovely, even hems that make your projects look so professional. Plus, if you have any excess fabric, you can use your gauge to measure how much you need to trim or tuck under for a neat finish.

Sewing Gauge: Position the gauge and mark along the sliding marker

Perfect Pleats and Tucks are Within Reach!

If you’ve ever admired those beautifully structured garments with crisp pleats or neat little tucks, you might have wondered how they achieve such precision. Well, the secret often lies in the humble Sewing Gauge! This little tool is an absolute whiz when it comes to marking and measuring these details accurately, making them so much easier to create.

Let’s say you’re working on a skirt with evenly spaced pleats. Here’s how your Sewing Gauge can come to the rescue:

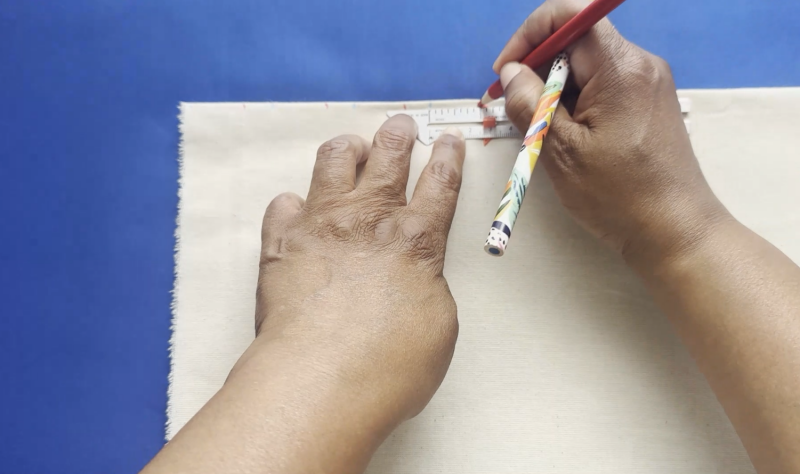
Perfect Pleats and Tucks: Mark your placement lines
  1. Understand your pattern: Your pattern instructions will tell you the width of your pleats and the spacing between them. Let’s imagine our pleats are 1 inch wide, with a half-inch space between each one.
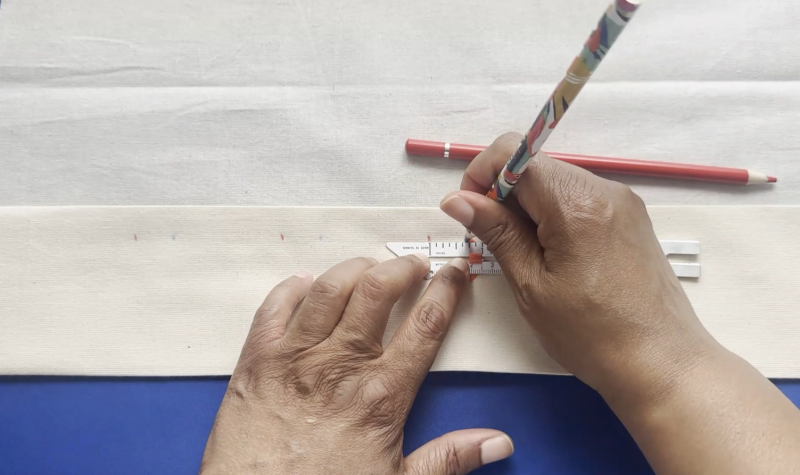
  2. Mark your placement lines: Using your Sewing Gauge and a fabric marker (I still love those vanishing ones for this!), start marking the placement lines for each pleat. For the first pleat, you’ll mark a line where the fold will start. Then, measure one inch (the width of the pleat) with your Sewing Gauge and mark another line – this is where the fold will end up meeting.
  3. Mark your fold lines: Now, to make it super clear which line is which, you can use a different coloured fabric marker for the fold lines. Measure half an inch (the space between the pleats) from your second marked line and make another mark in your second colour. This is where the next pleat will start to fold. Then, measure another inch for the width of the next pleat and mark that placement line in your first colour.
  4. Repeat: Continue this process along the fabricplacement line (colour one), pleat width (measured with the gauge), fold line (colour two), space between pleats (measured with the gauge), next placement line (colour one), and so on.
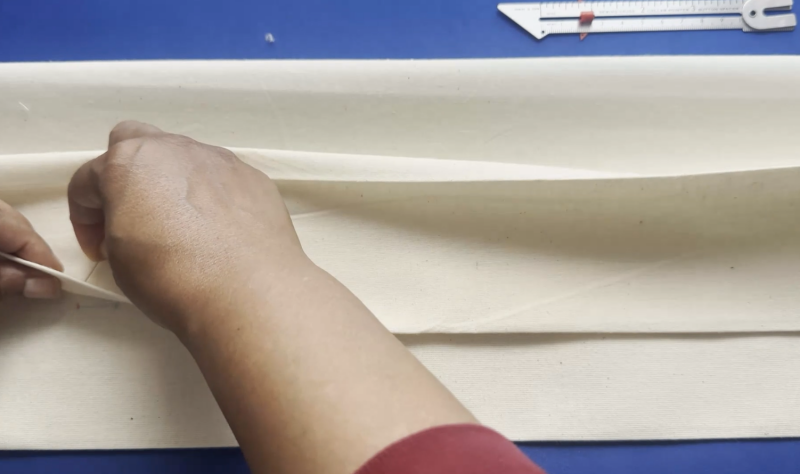
  5. Folding and pressing: Because you’ve used different colours, it’s now super easy to see which lines need to meet when you fold your pleats. You’ll fold your fabric so that your fold line (colour two) aligns perfectly with your placement line (colour one). Press each pleat as you go to create those lovely, crisp folds.
Perfect Pleats and Tucks: Folding and pressing

The Sewing Gauge ensures that each pleat is the same width and that the spaces between them are consistent, giving your garment a really professional and uniform look. The same principle applies to creating tucks – you simply mark the lines for the edges of your tucks using the gauge to ensure they are the correct width and evenly spaced. It takes away so much of the guesswork and fiddliness!

Button Placement and Buttonholes: No More Guesswork!

If you’ve ever struggled with buttons that are slightly off-centre or buttonholes that don’t quite line up, you’ll appreciate how much of a game-changer your Sewing Gauge can be for this task. There’s nothing more frustrating than finishing a beautiful garment only to find that your buttons look a bit wonky! This little tool helps you achieve that professional, well-aligned look every time.

Here’s how you can use your Sewing Gauge to take the stress out of button and buttonhole placement:

1. Marking Buttonhole Placement:

    • Determine your button spacing: Your pattern will usually indicate how far apart your buttons should be. Use your Sewing Gauge to measure this distance.
    • Mark the top and bottom of each buttonhole: Decide on the length of your buttonholes (again, your pattern will guide you). Using your Sewing Gauge, mark the top point of your first buttonhole on your fabric with a fabric marker. Then, measure down the required length and mark the bottom point.
Sewing Gauge: Marking Buttonhole Placement
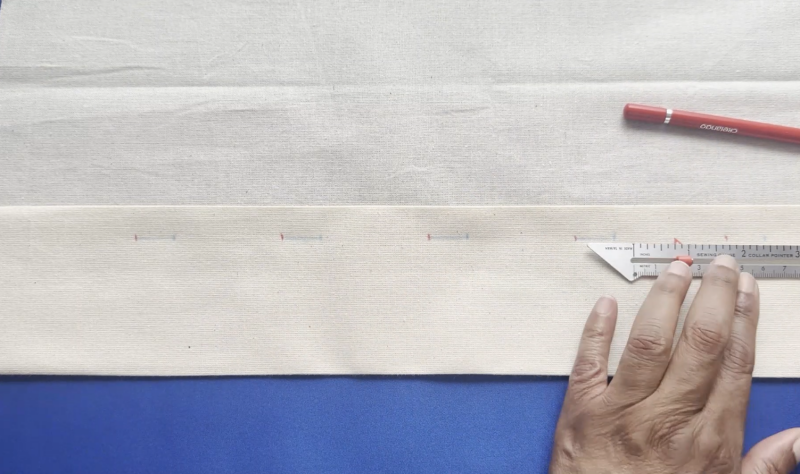
    • Use consistent spacing: Now, using the button spacing measurement you took earlier with your Sewing Gauge, measure down from the bottom of your first buttonhole to mark the top of your next buttonhole, and then mark its bottom point according to the buttonhole length. Repeat this process for all your buttonholes.
    • Colour-coding (optional but helpful): Just like with pleats, you can use different coloured vanishing pens for the top and bottom marks of your buttonholes. This makes it super clear which mark corresponds to which part of the buttonhole when you come to sew them.
Sewing Gauge: Use consistent spacing and colour-coding

2. Ensuring Even Button Spacing:

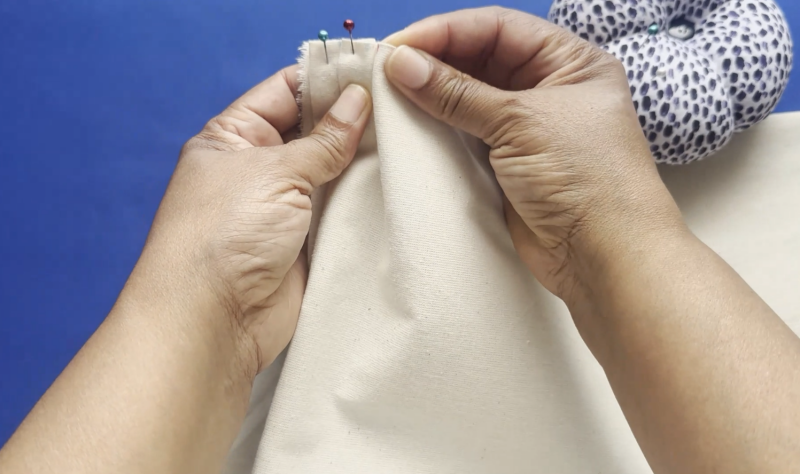
    • Mark the first button position: Once your buttonholes are sewn, you’ll need to mark where your buttons should be placed on the opposite side of your garment. Line up the buttonhole placket with the button placket.
    • Use your Sewing Gauge to transfer marks: Insert a pin through the top of the first buttonhole to mark the corresponding position on the button placket. Then, use your Sewing Gauge to measure the distance to the next buttonhole and mark the corresponding position for the next button. Repeat this for all your buttons. This ensures that your buttons will line up perfectly with your buttonholes.
Ensuring Even Button Spacing: Mark the first button position

By using your Sewing Gauge for these steps, you eliminate so much of the guesswork involved in button and buttonhole placement. You can be confident that everything will be evenly spaced and perfectly aligned, resulting in a much more professional and functional finish to your sewing projects. No more struggling to button up your beautifully made garment because the buttons are in the wrong spot!

Ensuring Even Button Spacing: Use your Sewing Gauge to transfer marks

Bonus Features: More Than Just Measuring!

You might think that a Sewing Gauge is just for straight lines and distances, but it’s actually a surprisingly versatile little gadget with a few extra functions that can come in super handy in your sewing room. Let’s explore some of these hidden talents!

Using the Shaped End as a Point Turner:

Take a good look at one of the ends of your Sewing Gauge. You’ll often notice that it has a slightly pointed or shaped edge. Well, guess what? This can double up as a rather effective point turner! When you’re sewing things like collars, cuffs, or the corners of bags, you often need to turn them right-side out and get those corners looking nice and crisp. Instead of fumbling with a knitting needle or the end of your scissors (which can sometimes poke through your fabric!), you can use the shaped edge of your Sewing Gauge.

Sewing Gauge: Using the Shaped End as a Point Turner

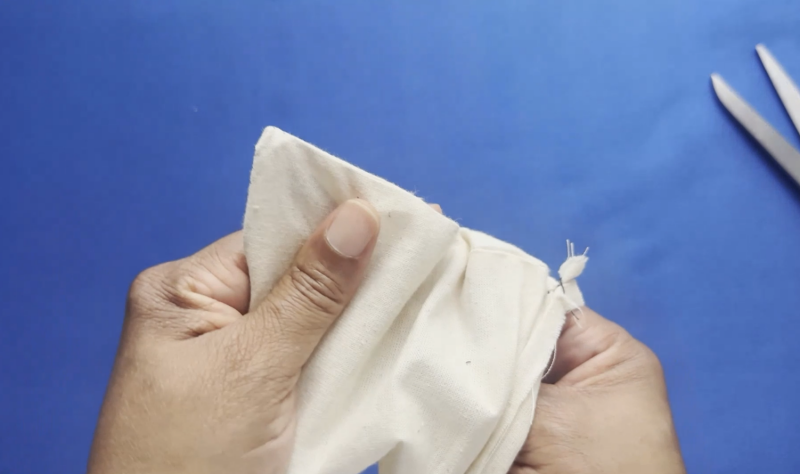
Here’s how: After you’ve sewn your seam and trimmed the excess fabric at the corner (being careful not to cut through your stitching!), carefully insert the shaped end of your Sewing Gauge into the inside of the fabric at the corner. Gently push outwards from the inside. The smooth, slightly pointed shape helps to ease the fabric out and create a much sharper, more defined corner. It’s a really gentle way to get those professional-looking points without risking damage to your fabric.

Insert the shaped end of your Sewing Gauge into the inside of the fabric at the corner

What About The Holes On The Sliding Bit?

Now, have you ever noticed those little holes on either side of the sliding marker on your sewing gauge and wondered what they’re for? Well, here’s a brilliant little trick, especially if you’ve got a mountain of hemming to get through! These holes are actually designed to help you keep that sliding marker – and therefore your hem measurement – exactly where you want it, making for super accurate and consistent hems.

Sewing Gauge: What About The Holes On The Sliding Bit?

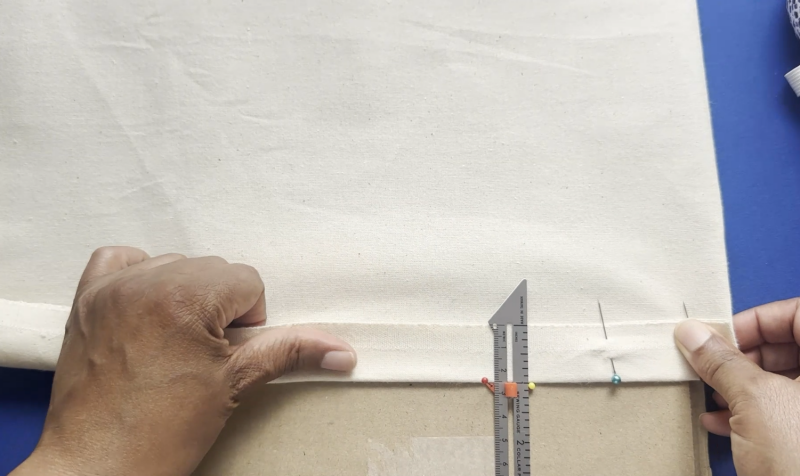
First, slide the marker on your sewing gauge to the hem depth you need – let’s say a nice, even 1 inch. Once it’s in the right spot, grab a couple of your trusty sewing pins and pop one into each of those little holes on either side of the sliding marker. Push the pins down into your fabric so the sewing gauge is held firmly in place at that 1-inch mark.

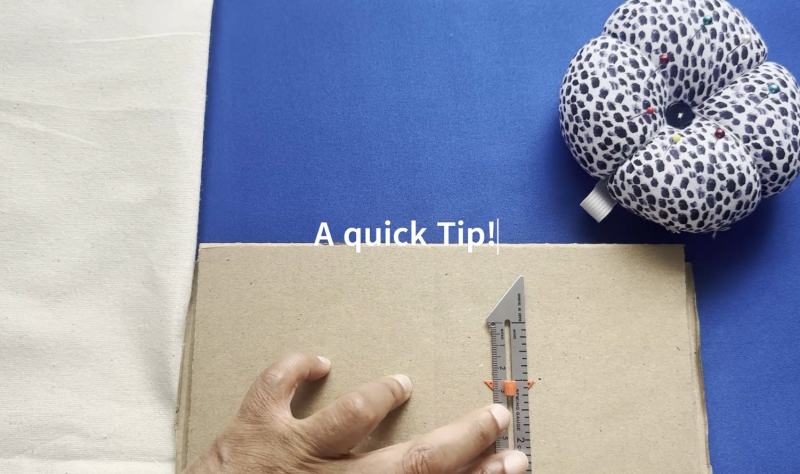
A quick tip here: You can place a flat piece of thick cardboard underneath the fabric, so when you pin down the sewing gauge, it’s held firmly in place.

A quick tip here: You can place a flat piece of thick cardboard underneath

Now, all you need to do is line up the raw edge of your fabric with the edge of the sewing gauge. Once it’s aligned, pop another pin into your hem to hold it in place. Then, just slide your fabric along, keeping that raw edge lined up with the edge of your pinned sewing gauge, and continue to pin your hem as you go. The pinned sewing gauge acts like a reliable little guide, ensuring your hem is the same perfect depth all the way around your project. It’s a real game-changer for getting those professional-looking hems without all the constant measuring!

The pinned sewing gauge acts like a reliable little guide

Creating Button Shanks Using the Raised Notches:

Remember those little raised bumps or notches you might have spotted along the edge of your Sewing Gauge? These are actually a clever little feature designed to help you create button shanks! A button shank is that little bit of space between the button and the fabric, which is really important, especially for thicker fabrics. It allows the button to sit properly when the garment is buttoned up and prevents the fabric from puckering or looking bulky.

Sewing Gauge: Creating Button Shanks

Here’s how to use them:

  1. Place the gauge: Position your Sewing Gauge on your fabric where you want to sew your button. Make sure the raised notch (or notches, if you need a longer shank) is sitting underneath where the centre of the button will be.
  2. Place the button: Put your button on top of the Sewing Gauge, directly over the raised notch(es).
  3. Stitch through: Now, thread your needle and stitch your button onto the fabric, going through the holes in the button and down into the fabric. Because the gauge is creating a little lift, your button won’t be sitting flush against the fabric.
  4. Remove the gauge: Once your button is securely stitched, carefully slide the Sewing Gauge away. You’ll now see that your button has a little shank of thread holding it slightly away from the fabric.
  5. Secure the shank: To make the shank nice and sturdy, bring your needle up between the fabric and the button, wrap the thread around the shank a few times, and then stitch back down into the fabric to secure it.
Creating Button Shanks: Position your Sewing Gauge

This little trick ensures you get the perfect amount of space for your buttons to sit comfortably!

Drawing Circles Using the Holes in the Gauge:

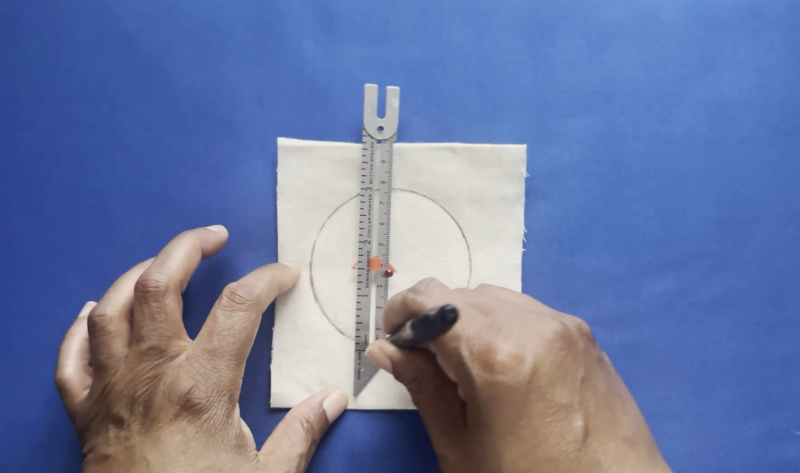
And finally, some Sewing Gauges even have a couple of small holes along their length. These can be used to draw perfect little circles, almost like a mini compass!

Sewing Gauge: Drawing Circles Using the Holes

Here’s how:

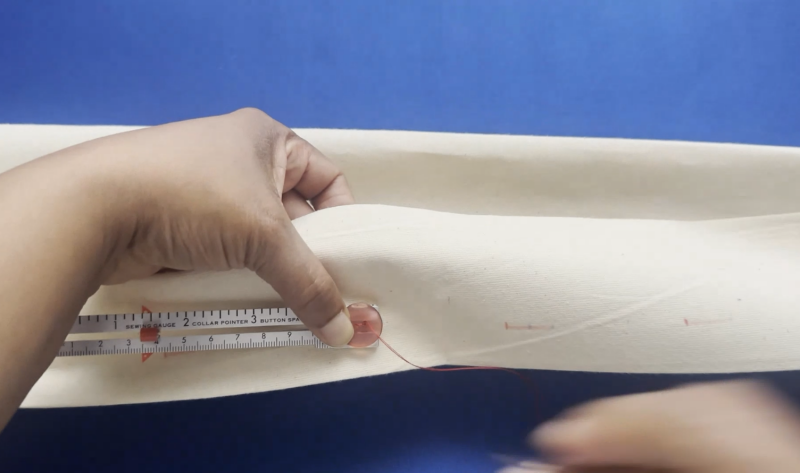
  1. Place your pivot: Put a pin (or the tip of another fine-pointed tool) through the tiny little hole on the slidy bit of the sewing gauge. This will be the centre point of your circle. Slide the gauge to the width of your circle (e.g. 2 centimetres or 2 inches, etc.).
  2. Insert your pen: Place the tip of your fabric marking pen into the hole at the top of the sewing gauge. The distance between the hole with the pin and the hole with the pen will be the radius of your circle.
  3. Rotate: Keeping the pin firmly in place, carefully rotate the Sewing Gauge around it. The pen in the other hole will draw a nice, clean circle on your fabric.
Keeping the pin firmly in place, carefully rotate the Sewing Gauge around it.

This is super handy for creating appliques, marking cutting lines for circular shapes, or any other time you need a perfect circle in your sewing projects.

Who knew this little Sewing Tool was so multi-talented, eh?

Caring for Your Trusty Sewing Gauge

Your Sewing Gauge is a pretty straightforward sewing tool, and thankfully, it doesn’t require a lot of fuss to keep it working well for you. A little bit of simple care will ensure it lasts for ages and remains a reliable friend in your sewing box.

The main thing to keep in mind is to keep it clean and free from any dust or stray threads. After you’ve been using it, just give it a quick wipe down with a soft cloth. If you happen to get any sticky residue on it (perhaps from accidentally touching it with something sticky fingers!), you can use a slightly damp cloth to gently wipe it clean. Avoid using any harsh chemicals or abrasive cleaners, as these could potentially damage the markings or the material of your Sewing Gauge.

When you’re not using your Sewing Gauge, it’s a good idea to store it somewhere safe in your sewing kit. A dedicated drawer or a container for your smaller sewing tools is ideal. This will help prevent it from getting bent, scratched, or lost amongst your fabric scraps and other supplies. Because it’s usually made of metal or sturdy plastic, it’s a pretty durable sewing tool and should withstand regular use for a good long time with just a little bit of care.

So, there you have it – simple but effective ways to look after your wonderful Sewing Gauge!

Caring for Your Trusty Sewing Gauge | How To Sew

FAQs

Now, even though I’ve shared all sorts of handy ways to use your Sewing Gauge, it’s perfectly normal to still have a few little questions popping into your head. So, I’ve gathered some of the most common queries folks have about this fantastic sewing tool, and hopefully, these answers will clear up any lingering bits of confusion!

What’s the difference between a Sewing Gauge and a regular ruler?

That’s a great question! While both a Sewing Gauge and a regular ruler are used for measuring, the Sewing Gauge has that super handy sliding marker. This makes it much easier to consistently measure the same distance repeatedly, which is a real time-saver when you’re marking hems, buttonholes, pleats, and more. A regular ruler is great for longer measurements, but for those smaller, repetitive tasks, the Sewing Gauge really shines.

Is a Sewing Gauge the same as a Seam Allowance Guide foot for my machine?

Not quite. A Seam Allowance Guide foot attaches to your sewing machine and helps you sew seams at a consistent width. A Sewing Gauge, on the other hand, is a hand-held measuring sewing tool that you use for marking and measuring before you start sewing. They work together brilliantly, though! You might use your Sewing Gauge to mark your seam allowance on your fabric, and then use your Seam Allowance Guide foot to help you stitch along that line accurately.

Can I use a Sewing Gauge for measuring curved lines?

While the Sewing Gauge is primarily designed for straight measurements, you can use it in small increments to get an approximate measurement of a gentle curve. However, for more accurate curved measurements, you might want to invest in a flexible measuring tape or a curved ruler.

What are Sewing Gauges typically made from?

Most Sewing Gauges are made from either metal or sturdy plastic. Metal ones tend to be very durable and long-lasting, while plastic ones are often a bit lighter and more affordable. Both types work really well for their intended purpose.

Where can I buy a Sewing Gauge or Seam Gauge?

You can find Sewing Gauges (or Seam Gauges) at most haberdasheries, craft shops, and online retailers that sell sewing tools and supplies. They’re usually pretty easy to find and aren’t too expensive, making them a great addition to any beginner’s sewing kit.

Hopefully, those answers have cleared up any questions you might have had about your wonderful Sewing Gauge!

Conclusion

So there you have it! The humble little Sewing Gauge, often overlooked but oh-so-incredibly useful. As we’ve discovered, this isn’t just a simple ruler; it’s a versatile sewing tool that can truly elevate your sewing projects, especially when you’re just starting out. From ensuring those perfect, even hems to taking the guesswork out of button and buttonhole placement, and even those clever bonus features like creating button shanks and turning out crisp corners, the Sewing Gauge really is a multi-tasking marvel.

Don’t underestimate the power of this little gadget in your sewing kit. It’s all about accuracy and consistency, which are key ingredients for creating projects you can be truly proud of. By taking the time to learn how to use your Sewing Gauge effectively, you’ll find that many of those fiddly tasks become much more manageable and your finished results will have that lovely, professional touch.

Ready to continue building your essential sewing skills and knowledge? Download my free beginner’s sewing guide e-book now for a comprehensive guide to all the basics and beyond!