Point Turner & Button Gauge: Unlock Crisp Corners and Perfect Buttons
Getting to Know Your Point Turner and Button Gauge
Meet the point turner and its often-attached pal, the button gauge. Now, these might seem like simple little gadgets, but trust me, they are absolute must-haves in your workbox and are incredibly handy for all sorts of sewing tasks.
Think about those lovely crisp corners you admire on shop-bought items – on collars, cuffs, the corners of bags, or neat little pocket edges. Well, the point turner is your secret weapon for achieving those! With its clever pointy end, you can gently coax those corners out to a perfect point, making your projects look so much more professional.
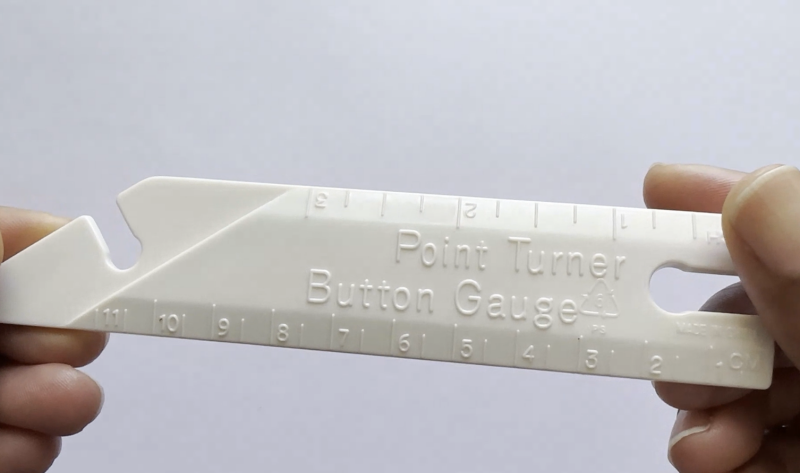
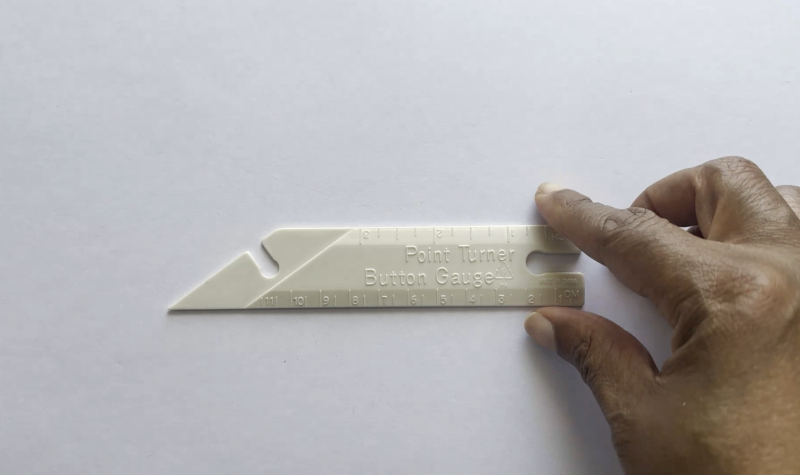
So, what exactly are these two helpful sewing tools we’re talking about? A point turner is usually a slender tool, often made of plastic, wood, or metal, and features a pointed end. Some point turners also have a slightly curved or flattened end, which can be useful for smoothing out curves or pressing seams open without leaving marks.
The point turner also has markings in both centimetres on one side and inches on the other, making it brilliant for accurately measuring and marking things like your hem allowances. No more wonky hems – hooray! You can mark your fabric with precision, turn up your hem on that exact line, and pin it in place, ready for a lovely, even stitch.
Now, quite often, the point turner comes hand-in-hand with another clever feature: a button gauge. The button gauge is typically integrated into the design of the point turner, often running along the side of the tool. It has a series of small notches or holes specifically designed for creating button shanks.
The beauty of having a point turner combined with a button gauge is that you get two incredibly useful sewing tools in one! This not only saves space in your sewing tools box but can also be more economical than buying them separately. They really are a dynamic duo, working together to help you achieve those professional-looking details that elevate your sewing projects. So, let’s get to know how to use each part of this fantastic sewing tool!
Achieving Crisp Corners with Your Point Turner
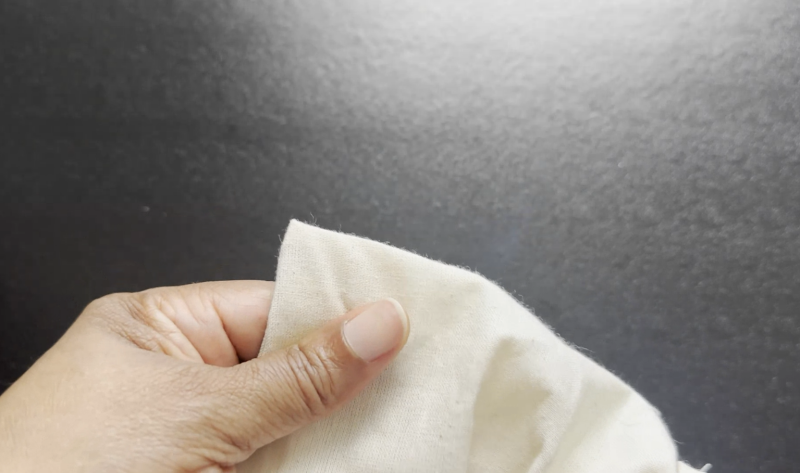
There’s nothing quite like a beautifully turned-out corner to give your sewing projects that polished, professional touch. Whether it’s the sharp point of a collar, the neat edge of a cuff, the sturdy corner of a bag, or the precise angle of a pocket, a well-defined corner can really make all the difference. And that’s where your trusty point turner comes into its own!
Here’s a step-by-step guide on how to use the pointed end of your point turner to turn out corners effectively:
- Sew your seam: First things first, you’ll have sewn your fabric pieces together along the seam that creates the corner. Make sure your stitches are secure right up to the very point of the corner.
- Trim the seam allowance: Now, carefully trim the seam allowance diagonally across the corner, getting as close to the stitching as you can without actually cutting through it. This reduces bulk in the corner and helps it lie flatter when turned. For very sharp points, you might even trim the seam allowance into a little triangle.
- Turn the fabric right-side out: Gently turn your fabric so that the right sides are facing outwards. You’ll now have a little pouch with the corner still tucked inside.
- Insert the point turner: This is where the magic happens! Carefully insert the pointed end of your point turner into the inside of the fabric at the corner. Gently push outwards from the inside, working that corner out to its fullest extent. You’ll want to be firm but gentle – avoid jabbing or forcing the point turner too hard, as you could accidentally poke a hole through your precious fabric. Wiggling it slightly can sometimes help ease the fabric out.
- Shape the corner: Once the corner is fully turned out, use your fingers to gently shape it and make sure the seam lies nice and flat along the edges.
- Press: Finally, give that corner a good press with your iron. This will help to set the shape and create a really crisp, professional finish.
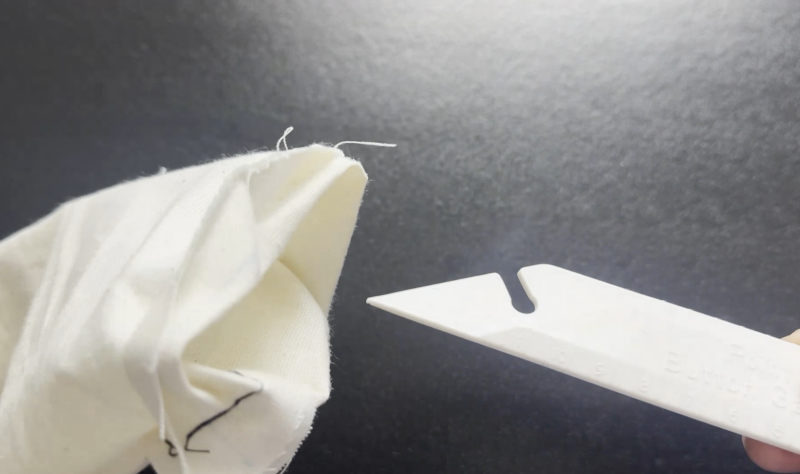
Now, some point turners also have a slightly curved or flattened end. This end can be really useful for gently smoothing out curves in your seams or for pressing seams open without leaving any unwanted marks on your fabric. You can simply use it to run along the inside of the seam as you press from the right side.
With a little practice, you’ll be turning out perfect corners every time, all thanks to your trusty point turner!
Hemming with Precision Using Your Point Turner
We talked earlier about how important it is to get your hems nice and even for a professional finish, and guess what? The ruler part of your point turner is a fantastic sewing tool for achieving just that! Often featuring both centimetre and inch markings, it allows you to measure and mark your hem allowances with accuracy and ease. Say goodbye to wonky, uneven hems!
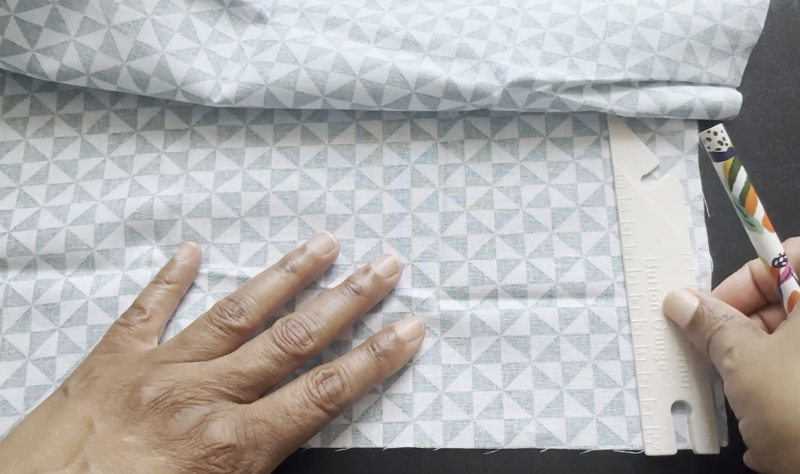
Here’s a simple step-by-step guide on how to use the measurements on your point turner to mark your hem allowances:
- Decide on your hem depth: Your pattern instructions will always specify the required hem allowance. This might be in centimetres or inches, so make sure you’re looking at the correct side of your point turner. Let’s imagine your pattern calls for a 5-centimetre hem.
- Turn your fabric to the wrong side: This is where you’ll be doing your measuring and marking. Lay your fabric flat on your work surface.
- Use your point turner to measure: Place the edge of your point turner along the raw edge of your fabric. Find the 5-centimetre mark on the point turner.
- Make your first mark: Using a fabric marker (a vanishing ink pen is always a good choice for hems as the marks will disappear!), make a small dot or a short line on your fabric at the 5-centimetre mark along the edge of your point turner.
- Repeat along the hemline: Now, move your point turner along the edge of your fabric, keeping the edge of the point turner aligned with the raw edge of the fabric. At regular intervals (every few centimetres or inches), use the 5-centimetre mark on your point turner to make another mark on your fabric. The more marks you make, the easier it will be to fold your hem accurately.
- Connect the marks (optional): If you prefer, you can use a longer ruler to draw a continuous line connecting all the marks you’ve made. This gives you a clear guideline to follow when you fold your hem.
- Turn up the hem: Once you have your marked line (or series of marks), carefully fold your fabric up along that line to create your hem. Press it with your iron to create a nice, crisp fold.
- Pin in place: Secure your hem in place with pins, ready for stitching.
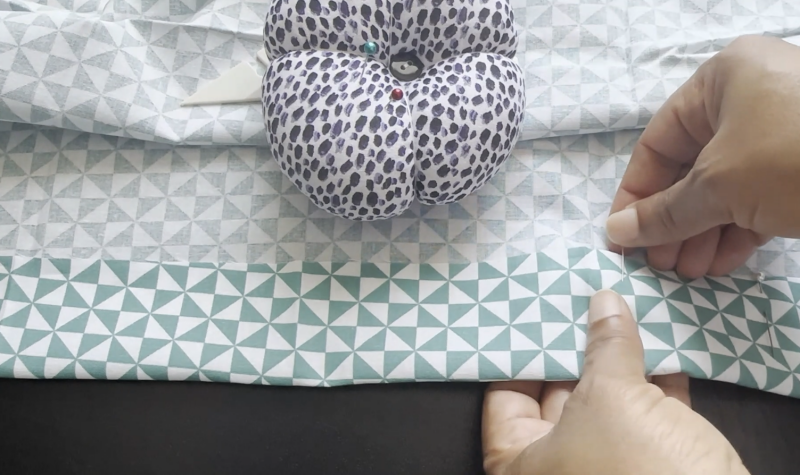
Having both metric and imperial measurements right there on your point turner is incredibly convenient, especially if you work with patterns from different regions that might use different measurement systems. It saves you from having to reach for a separate ruler and ensures that your hem allowance is exactly the depth you need it to be all the way around your project. Accurate hemming really does make a huge difference to the overall look and quality of your finished sewing!
The Clever Button Shank Creator
If you’ve ever sewn a button onto a thicker fabric, like a coat or a heavy jumper, you might have noticed that if the button sits too flush against the fabric, it can make it difficult to button up neatly. This is where a button shank comes in handy! A shank is essentially a small extension or loop of thread between the button and the fabric. It allows the button to sit slightly away from the fabric, providing space for the fabric layers to overlap without bunching up or looking messy. And guess what? Your point turner and button gauge can be a fantastic sewing tool for creating these perfect little shanks!
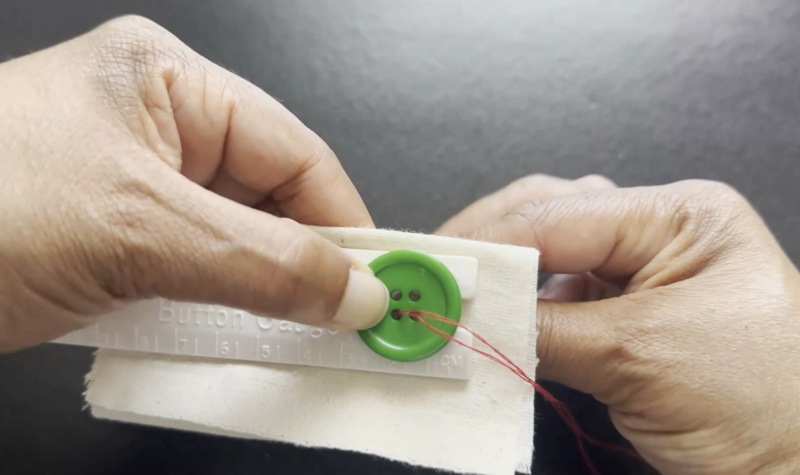
Here’s a step-by-step guide on how to use this clever feature:
- Position your fabric and button: Place your fabric right-side up where you want to sew your button. Position your button on top of the desired spot.
- Introduce the point turner/button gauge: Now, take your point turner and button gauge. You’ll want to use the button gauge part of the tool that has a consistent thickness – often the main body of the point turner itself. Place button gauge part of the point turner directly over the marked button position on your fabric, so it’s lying between the fabric and the button.
- Hold everything in place: Gently hold the point turner and the button together, ensuring they don’t slip.
- Sew through the buttonholes: Thread your needle and, starting from the wrong side of your fabric, bring the needle up through one of the holes in your button. Then, stitch back down through another hole and through the fabric, making sure you’re going over the point turner that’s acting as a spacer. Repeat this several times (usually 4-6 times for a four-hole button) to securely attach the button.
- Remove the point turner: Once your button is firmly attached, carefully slide the point turner away from under the button. You’ll now see that your button is sitting slightly raised above the fabric, thanks to the thickness of the point turner you used as a guide. This creates your shank!
- Create a thread shank (optional but recommended): For extra stability and a neater finish, bring your needle back up through the fabric, right next to where your button is attached. Now, wrap the thread tail tightly around the shank you’ve created (the space between the button and the fabric) several times. This reinforces the shank and makes it more durable. Finally, stitch back down into the fabric to secure the thread.
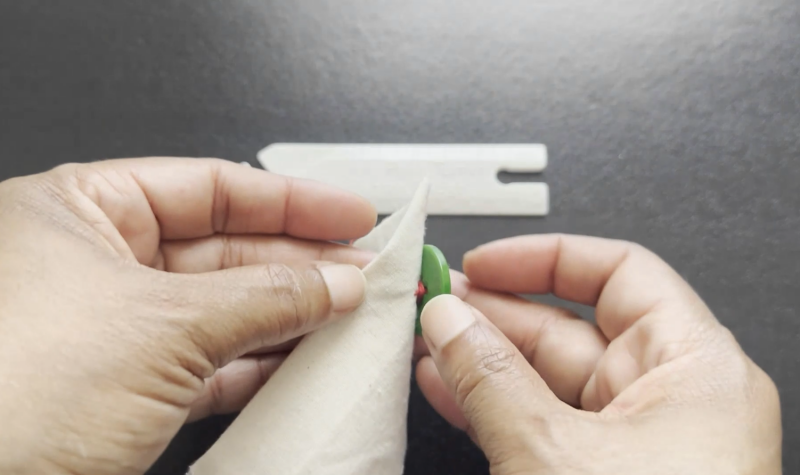
You can use different thicknesses of your point turner (or even multiple layers of it) to create shanks of varying lengths, depending on the thickness of your fabric and the size of your button. For two-hole buttons, you would follow the same principle, ensuring the point turner is positioned appropriately under the button as you stitch.
Creating a button shank using your point turner and button gauge is a simple yet effective technique that will make your buttoned garments look so much more professional and comfortable to wear!
The Unexpected Humper Jumper
Have you ever tried to start sewing a seam on a very thick fabric, like denim or multiple layers of heavy cotton, especially right at the edge of a hem? If so, you might have noticed that the presser foot on your sewing machine can sit at a bit of an angle. This is because the bulk of the fabric is already under the foot, but the very edge you’re starting on is lower. This uphill start can sometimes lead to skipped stitches, uneven feeding, or even the needle getting stuck.
Well, here’s a clever trick using your point turner (or the button gauge part of it) to help you overcome this “hump” and get a nice, even start to your seam! It acts as a temporary levelling tool, often referred to as a “humper jumper” or a similar term.
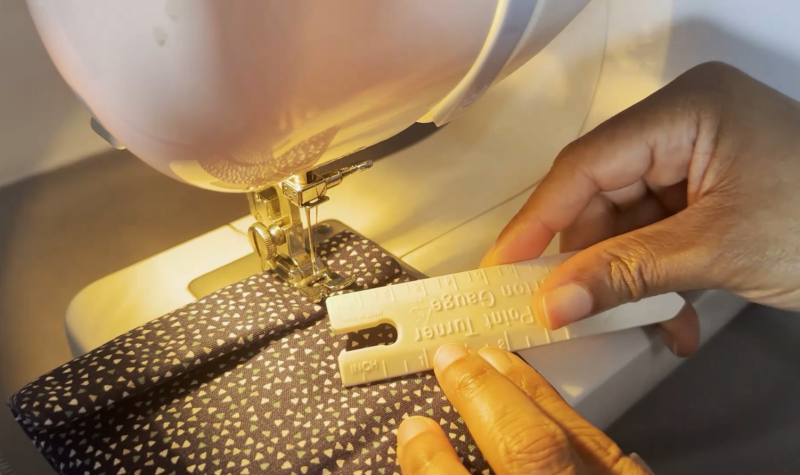
Here’s how to use your point turner in this way:
- Position your fabric: Place your thick fabric under the presser foot of your sewing machine, aligning it where you want to start your seam, usually right at the folded edge of a hem.
- Notice the angle: Lower your presser foot slightly, and you’ll likely see that the front of the foot is lower than the back because of the thickness of the fabric already under it.
- Introduce the point turner: Now, gently lift your presser foot a little higher. Take your point turner (or the thicker, flatter part of your button gauge) and slide it underneath the back edge of your presser foot, behind where the needle will go down. You want it to be sitting on top of the thick fabric that’s already under the foot.
- Lower the presser foot: Carefully lower your presser foot again. You should now see that the presser foot is much more level because the point turner is acting as a temporary support at the back, “jumping over the hump” of the thick fabric edge.
- Lower the needle and start sewing: Lower your needle into the fabric. You might want to slightly increase your stitch length if you’re sewing through a lot of layers of thick fabric. Begin sewing your seam as normal.
- Remove the point turner: Once the presser foot has moved forward and is fully sitting on the thick fabric, you can gently slide the point turner away from behind the foot. By this point, your seam should have started nice and evenly, without any skipped stitches or uneven feeding.
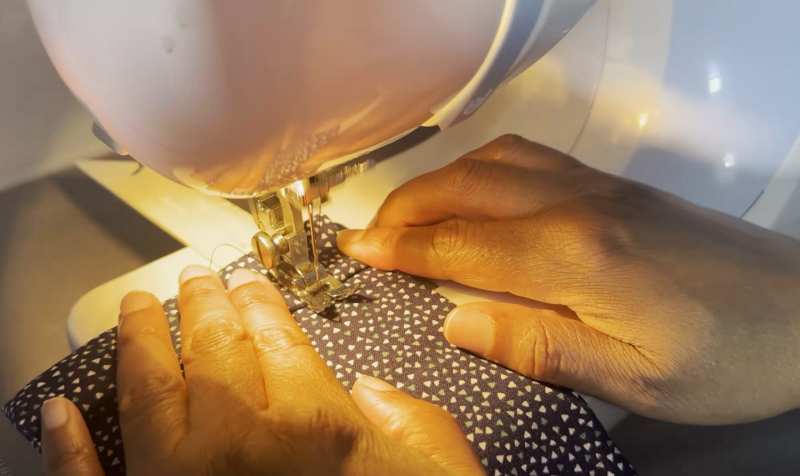
This simple trick can make a real difference when you’re working with bulky fabrics and helps to ensure a smooth and professional start to your seams. It’s another unexpected but incredibly useful way to get the most out of your trusty point turner!
Caring for Your Point Turner and Button Gauge
Just like any of your favourite sewing tools, a little bit of care and attention will help your point turner and button gauge last longer and perform its job effectively for years to come. Thankfully, they don’t require a lot of maintenance – a few simple habits will do the trick.
The main thing to keep in mind is to keep them clean. As you’re working on various sewing projects, they might pick up dust, lint, or even little bits of stray thread. Simply wiping them down with a soft, dry cloth after each use will help to keep them in good condition. If you happen to get any sticky residue on them (perhaps from handling fabric that’s been treated with something), you can use a slightly damp cloth to gently wipe it clean. Just make sure they’re completely dry before you put them away.
When you’re not using your point turner and button gauge, it’s best to store them safely in your sewing tools box or a dedicated container. This will prevent them from getting scratched, bent, or lost amongst your other sewing supplies. Because they’re usually made from sturdy materials like plastic, wood, or metal, they are generally quite durable and should withstand regular use. However, storing them carefully will definitely help to prolong their lifespan.
So, a little wipe here and there and keeping them stored safely – that’s all it takes to keep your point turner and button gauge ready for action whenever you need them!
FAQs
Now, even after all this helpful information, it’s perfectly normal to still have a few little questions buzzing around in your head! So, I’ve put together some of the frequently asked questions about using a point turner and button gauge, and hopefully, these will provide all the answers you need!
Is a point turner always combined with a button gauge?
Not always, no. You can definitely buy point turners as standalone sewing tools. However, you’ll often find them combined with a button gauge as it’s a really convenient pairing, giving you two useful functions in one handy tool.
Can I use other tools to turn corners?
Yes, you can use other tools in a pinch, such as a knitting needle, a chopstick, or even the blunt end of a pair of closed scissors. However, a point turner is specifically designed for this task with a smooth, slightly rounded point that’s less likely to poke through your fabric than something sharper.
Why is it important to create a button shank?
Creating a button shank provides space between the button and the fabric. This is particularly important for thicker fabrics, as it allows the button to sit properly when the garment is buttoned up without causing the fabric to bunch up or look messy. It also makes the garment more comfortable to wear.
Can I use the button gauge to measure button sizes?
While the button gauge has measurements on it, it’s not its primary function for buttons. It’s mainly designed for measuring distances for button placement and for creating the shank. For accurately measuring button sizes, you’d typically use a small ruler or a button sizing card.
Where can I buy a point turner and button gauge?
You can find point turners and button gauges at most haberdasheries, craft shops, and online retailers that sell sewing tools and supplies. They are usually quite affordable and are a great investment for your sewing kit.
Hopefully, these answers have helped to clear up any lingering questions you might have about using your point turner and button gauge!
Conclusion
So there you have it! The point turner and button gauge – two seemingly simple sewing tools that are absolute workhorses in your sewing arsenal. From achieving those beautifully crisp corners that give your projects a professional edge to ensuring perfectly even hems and creating those all-important button shanks, these little gadgets really do make a big difference to the quality and finish of your work.
So, embrace the point turner and button gauge, get familiar with their different functions, and start incorporating them into your regular sewing routine. You’ll wonder how you ever managed without them!
Ready to take your sewing skills to the next level with more essential tips and techniques? Download my free beginner’s guide to sewing e-book now for a wealth of helpful information!